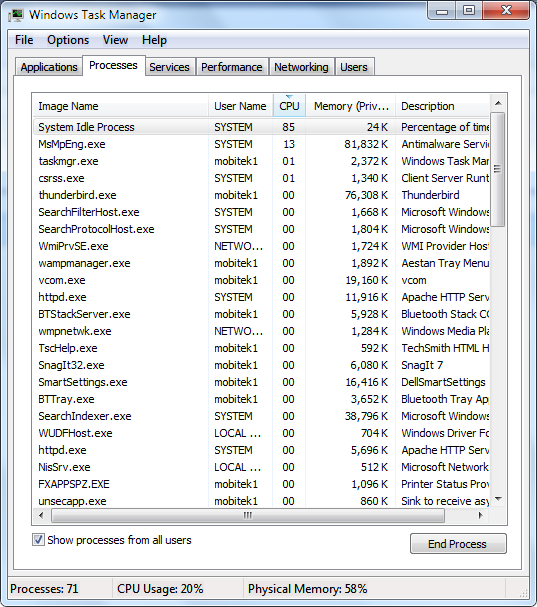
How WooCommerce Works?

  1. Customer view product and add item to cart.

  2. After all item added to cart, click Shopping Cart to view items in Cart.

  3. In this page, customer can modify his shopping car. Customer then click “Proceed to checkout”.

  4. Fill up the billing details.

    • check on checkbox at below then place order.
  5. Order details are sent to both customer and merchant by email:-


How to Fix High CPU Usage

Problem:

  1. CPU usage is high.
  2. “MsMpEng.exe” shows high process.

Solution:

  1. Uninstall all unwanted antivirus in Control Panel.
  2. Open Windows Defender and Look for update.
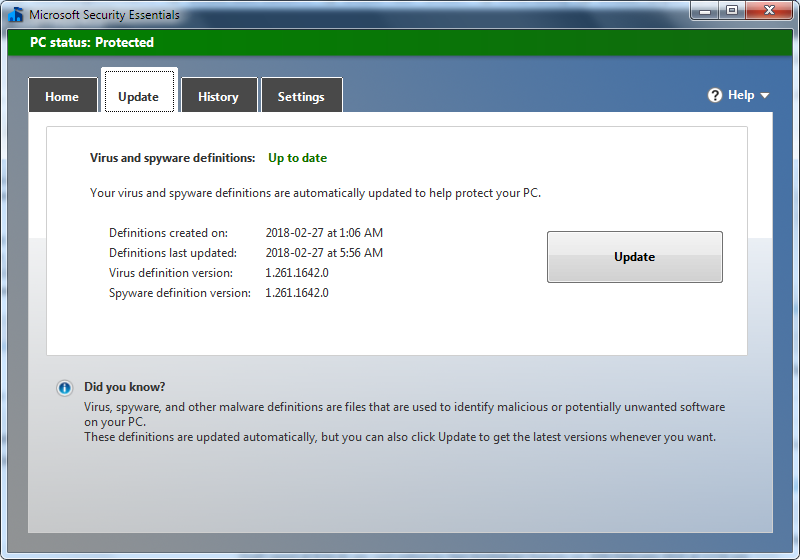
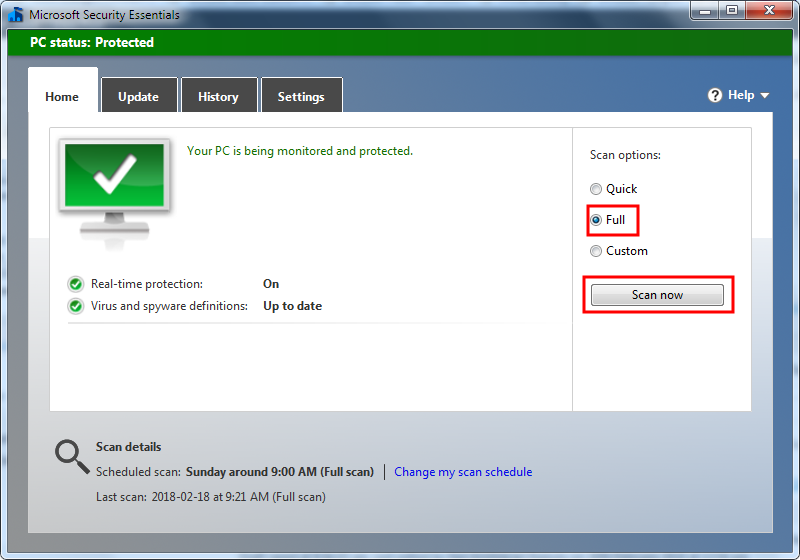
  3. If it is up to date, continue with Full Scan.
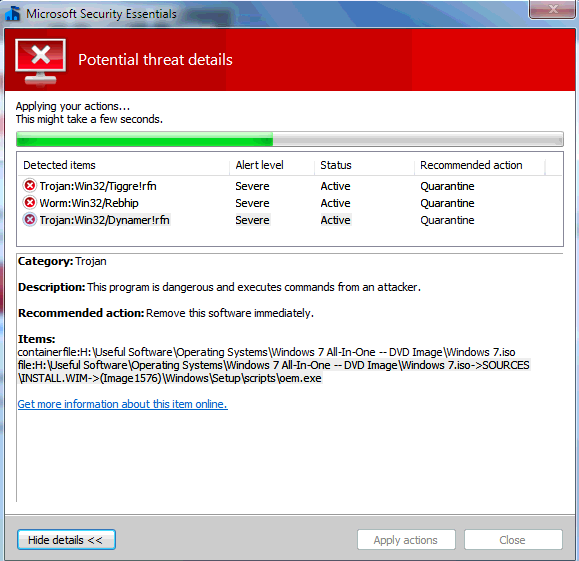
  4. For all the Detected items, change their Recommended Action to “Quarantine”.
  5. Observe for a week to see if the CPU usage is high.
  6. Problem solved.

Support Notices as at Feb 2018


PRODUCT SUPPORT NOTICE
MOBITEK MobiGATE Change Log of The Contents of MOBITEK MobiGATE Installer Has Been Revised
MOBITEK® Q24 STK Modem Hub MOBITEK STK Engine Supports Windows 10, Windows Server 2008 / 2012 / 2016
MOBITEK® Q24 STK Modem Hub MOBITEK STK API v. 6.5 Supports Java in Windows 10, Windows Server 2008 / 2012 / 2016
MOBITEK® Q24 STK Modem Hub MOBITEK STK API v. 6.5 Supports Windows 10, Windows Server 2008 / 2012 / 2016
MOBITEK S80 How to Send and Read SMS Using MOBITEK S80 Modem with SMS Express in AirCard Watcher
MOBITEK S80 How to Configure AirCard Watcher
MOBITEK S80 How to Make Voice Call Using MOBITEK S80 Modem and AirCard Watcher
MOBITEK S80 How to Integrate MOBITEK S80 SMS Modem with Network Monitoring System
MOBITEK MobiGATE Location of VCOM’s Setting
MOBITEK MobiGATE How to Solve VCOM “Progressing” Problem
MOBITEK MobiGATE Speed of Sending SMS Using MOBITEK MobiGATE
MOBITEK S80 Speed of Sending SMS Using MOBITEK S80 SMS Modem
MOBITEK MobiGATE and MOBITEK S80 Signal Strength
MOBITEK S80 How to Configure Sunix USB-to-Serial Converter in VirtualBox
MOBITEK MobiGATE MobiGATE Supports Windows 10, Server 2012 and Server 2016
MOBITEK S80 MOBITEK S80 3G Modem — Send SMS via API and Connect to 3G Network at the Same Time
MOBITEK S80 How to Configure MOBITEK S80 SMS Modem to Use SMS API and to Access Internet via 3G at the Same Time
MOBITEK S80 How to Use AirCard Watcher to Connect MOBITEK S80 3G Modem to 3G Network
MOBITEK S80 How to Set-Up MOBITEK S80 3G Modem in Linux Running in VirtualBox
MOBITEK S80 How to Set-Up MOBITEK S80 Modem in VirtualBox
MOBITEK MobiGATE How to Change the IP Address of MobiGATE Using “update.exe”
MOBITEK MobiGATE VCOM Showing “Connected” Then “Disconnected”
MOBITEK S80 USB Driver of MOBITEK S80 Supports Windows Server 2008, Windows Server 2012, Windows Server 2016 and Windows 10
MOBITEK Q24 STK Modem Hub and MOBITEK STK API MOBITEK STK API version 5.0 End of Support Notice
MOBITEK Q24 STK Modem Hub and MOBITEK STK API MOBITEK STK API version 6.5 Sample Codes
SMS360 – E-mail Edition SMS360 — E-Mail Edition Cannot Connect with POP3 Server of GMail


SMS Content Has Strange Alphabets and Numbers

Product: MOBITEK S80 Type S Expiry Date of Warranty and Support  2017-12-20
Which Development Kit are you using? What is the Operating System?
Which programming language are you using? SIM Card Used:
Description of Problem: I receive SMS with number and alphabet (unknown content) quite constantly. One of the SMS I receive as below,

005200650066003A005300310035003100370037000A
004F006D006500670061002000570061007400630068
000A0050006C006500610073006500200048006F006C
0064002C000A0044006F006E20190074002000700072
006F0063006500650064

could you assist.

Trouble Shooting:
Suggested Solution:

How to Solve “Workgroup is Not Accessible” and “Specified server cannot perform the requested operation”

Problem: These 2 error messages will pop-up when trying to connect to a Windows 7 PC from Windows XP PC.


Solution: need to perform 2 settings on both Windows 7 PC and Windows XP PC.

  1. refer to https://support.microsoft.com/en-us/help/318030/you-cannot-access-shared-files-and-folders-or-browse-computers-in-the
    /

    1. Step 1: Enable NetBIOS over TCP/IP
      1. Click Start, click Control Panel, and then click Network and Internet Connections.
      2. Click Network Connections.
      3. Right-click Local Area Connection, and then click Properties.
      4. Click Internet Protocol (TCP/IP), and then click Properties.
      5. Click the General tab, and then click Advanced.
      6. Click the WINS tab.
      7. Under NetBIOS setting, click Enable NetBIOS over TCP/IP, and then click OK two times.
      8. Click Close to close the Local Area Connection Properties dialog box.
      9. Close the Network Connections window.
        /
    2. Step 2
      1. Click Start, right-click My Computer, and then click Manage.
      2. Double-click Services and Applications.
      3. Double-click Services.
      4. On the right side, right-click Computer Browser, and then click Start.
      5. Close the Computer Management window.
  2. https://community.spiceworks.com/topic/268575-can-t-access-win-7-shared-folder-from-win-xp
    1. Run GPedit.msc
    2. Expand Computer Configuration -> Windows Settings -> Security Settings -> Local Policies -> Security Options
    3. Open the properties for Network security: LAN Manager authentication level
    4. Set the value to: Send LM & NTLM responses
    5. Run Services.msc
    6. Restart the Server service

Difference Between “Bridge” and “NAT” Mode in VirtualBox


QUESTIONS BRIDGE MODE  NAT MODE
What is the IP address of VM (guest)?
Note: the IP address of host is 192.168.10.56

Note: the IP address of host is 192.168.10.56
Can VM (guest) shared a folder and allow host to access the shared folder?
Can VM see other PCs/laptops on the MOBITEK workgroup? Yes No
Can VM access the internet? Yes Yes


How to Set to “Bridge Mode” in VirtualBox

  1. Click on “Settings new window will pop up for settings.
  2. Then, go to “Network at “Attached to:” option select “Bridged Adapter” and click “OK”.

Note: Not required to stop the machine/ shutdown for this settings.


How to Allow OS in VirtualBox to Access Internet

  1. Click on “Settings“, new window will pop up for settings.
  2. Then go to “Network” -> “Advanced”. In “Promiscuous Mode”, select “Allow VMs” or “Allow All“.