Category Archives: Support

How to Send E-Mail with MOBITEK Q25

DESCRIPTION AT COMMAND

Configure Parameters of a TCP/IP Context

AT+QICSGP=<contextID>,<context_type>,<APN>,<username>,<password>, <authentication>

AT+QICSGP=1,1,”yoodo”,””,””,0
OK

Activate a PDP Context

AT+QIACT=<contextID>

AT+QIACT=1
OK

AT+QIACT?
+QIACT: 1,1,1,”10.32.47.42″

OK

Configure SSL Type

//Set the SSL type for SMTP.

AT+QSMTPCFG=”ssltype”,<ssltype>

WITHOUT SSL

AT+QSMTPCFG=”ssltype”,0
OK


WITH SSL

AT+QSMTPCFG=”ssltype”,1
OK

AT+QSMTPCFG=”sslctxid”,1
OK

AT+QSSLCFG=”ciphersuite”,1,0xffff
OK

AT+QSSLCFG=”seclevel”,1,0 
OK

AT+QSSLCFG=”sslversion”,1,1
OK

Configure Parameters for SMTP Server

//Set the PDP context ID.

AT+QSMTPCFG=”contextid”,<contextID>

//Set the IP address or domain name and port of SMTP server.

AT+QSMTPCFG=”smtpserver”,<srvaddr>,<srvport>

//Set username and password.

AT+QSMTPCFG=”account”,<username>,<password>

//Set sender name and sender address.

AT+QSMTPCFG=”sender”,<sender_name>,<sender_email>

AT+QSMTPCFG=”contextid”,1
OK

AT+QSMTPCFG=”smtpserver”,”smtp.example.com”,587
OK

AT+QSMTPCFG=”account”,”*username*”,”$password$”
OK

AT+QSMTPCFG=”sender”,”MOBITEK”,”add-new-post@feed.mobitek.my”
OK

Add or Delete Recipients

AT+QSMTPDST=<mode>,<type>,<emailaddr>

Parameter:

  • <mode> – Integer type. Add or delete recipients:
    • 0 – Delete
    • 1 – Add
  • <type> – Integer type. The type of recipients:
    • 1 – All recipients
    • 2 – CC recipients
    • 3 – BCC recipients
  • <emailaddr> – String type. The email address of recipients. The maximum size of the parameter is 50 bytes.
AT+QSMTPDST=1,1,”sales@abc.my”
OK

AT+QSMTPDST=1,2,”marketing-director@abc.com”
OK

AT+QSMTPDST?
+QSMTPDST: 1,”sales@abc.my”
+QSMTPDST: 2,”marketing-director@abc.com”

OK

Edit the Subject of an Email

AT+QSMTPSUB=<charset>,<subject>

Parameter:

  • <charset> – Integer type. The character set of the subject.
  • <subject> – String type. The subject of the email. If <charset> is 0, this string will be the subject of the email. Otherwise, it is formatted as a hex string.
AT+QSMTPSUB=0,”TEST SMTP USING Q25″
OK

AT+QSMTPSUB?
+QSMTPSUB: 0,”TEST SMTP USING Q25″

OK

Edit the Body of an Email

AT+QSMTPBODY=<charset>,<body_length>,<input_time>

Parameter:

  • <charset> – Integer type. The character set of the body:
    • 0 – ASCII
    • 1 – UTF-8
    • 2 – GB2312
    • 3 – BIG5
  • <body_length> – Integer type. The specific length of body. If the length of inputted data is less than the specific value <body_length>, customers can exit from data mode by “+++”. The actual length of the body is the inputted data length. The range is 1-10240. Unit: byte.
  • <input_time> – Integer type. The maximum time to upload email body from COM port. The range is 1-65535, and the default value is 90. Unit: second.
  • Type to the email body after “CONNECT” appear. The words typed will not be visible.
AT+QSMTPBODY=0,50,60
CONNECT

+QSMTPBODY: 37

OK

Send an Email

AT+QSMTPPUT=<timeout>

Parameter:

  • <timeout> – Integer type. The maximum time to send an email. The range is 60-65535. Unit: second.
  • After “OK” response” then wait for the “+QSMTPPUT:” response. If the response is “+QSMTPPUT: 0,0” then the email sending is successful. If other number displayed in the first parameter, then the email sending has error. For example: “+QSMTPPUT: 665,0”.
AT+QSMTPPUT=300
OK

+QSMTPPUT: 0,0

Clear the Content of an Email

AT+QSMTPCLR

AT+QSMTPCLR
OK

Deactivate a PDP Context

AT+QIACT=<contextID>

AT+QIDEACT=1
OK


How to Set-Up Mosquitto MQTT Server

SETTING of MOSQUITTO MQTT SERVER VERSION 2.0.14 SCREEN SHOT
In “C:\Program Files\mosquitto”, open “mosquitto.conf” and add:

  • find “Listeners” and add
    listener 1883 0.0.0.0
  • find “Security” and add
    allow_anonymous true

Stop “Mosquitto Broker” in “Services”
Open command prompt as administrator and enter:

  • cd “C:\Program Files\mosquitto”
  • mosquitto -v -c mosquitto.conf


SETTING of TP-LINK Wireless Router Archer C1200 SCREEN SHOT REMARK
Open admin panel (192.168.1.1). Go to “Advanced” -> “NAT Forwarding” -> “Virtual Servers”, add:

  • Service Type = TCP
  • External Port = 1883
  • Internal IP = 192.168.1.102
  • Internal Port = 1883
  • Protocol = All
 

Connect MQTT Explorer or Q25 using the router’s Public IP:

or using DNS

How to Use MQTT with MOBITEK Q25 4G Modem

MOBITEK Q25 SETTINGS — MOSQUITTO MQTT SERVER

  1. Q25’s Setting:-
    • Remote Host: 175.*.*.* / *.dyndns.*
    • Remote Port: 1883
    • User Name: ***
    • User Password: ***
    • Subscribe Topic: Test
    • Publish Topic: Test
  2. Mosquitto version 2.0.14‘s Settings:-
    • In “C:\Program Files\mosquitto\mosquitto.conf”:
      • find “Listeners” and add
        listener 1883 0.0.0.0
      • find “Security” and add
        allow_anonymous true
    • Stop “Mosquitto Broker” in “Services”
    • Open command prompt as administrator and enter:
      • cd “C:\Program Files\mosquitto”
      • mosquitto -v -c mosquitto.conf
    • Add port forwarding in router:
      • Service Type = TCP
      • External Port = 1883
      • Internal IP = (Public IP of router)
      • Internal Port = 1883
      • Protocol = ALL


AT COMMANDS — MOSQUITTO MQTT SERVER

DESCRIPTION AT COMMAND

Configure Parameters of a TCP/IP Context

AT+QICSGP=<contextID>,<context_type>,<APN>,<username>,<password>, <authentication>

AT+QICSGP=1,1,”yoodo”,””,””,1
OK

Activate a PDP Context

AT+QIACT=<contextID>

AT+QIACT=1
OK

AT+QIACT?
+QIACT: 1,1,1,”10.*.*.*”

Configure receiving mode when data is received from server

AT+QMTCFG=“recv/mode”,<client_idx>,<msg_recv_mode>, <msg_len_enable>

AT+QMTCFG=”recv/mode”,0
+QMTCFG: “recv/mode”,0,0
OK

Open a network for MQTT client

AT+QMTOPEN=<client_idx>,“<host_name>”,<port>

AT+QMTOPEN=0,”175.*.*.*”,1883
OK
+QMTOPEN: 0,0

AT+QMTOPEN?

+QMTOPEN: 0,”175.*.*.*”,1883
OK

Connect a client to MQTT Server

AT+QMTCONN=<client_idx>,“<clientID>”,“<username>”,“<password>”

AT+QMTCONN=0,”Q25″,””,””
OK
+QMTCONN: 0,0,0

AT+QMTCONN?

+QMTCONN: 0,3
OK

Publish messages

AT+QMTPUBEX=<client_idx>,<msgID>,<qos>,<retain>,“<topic>”,<msg_length>

AT+QMTPUBEX=0,0,0,0, “Test”,30
> Q25 publish from Hyper Terminal
OK
+QMTPUBEX: 0,0,0

Subscribe to Topics

AT+QMTSUB=<client_idx>,<msgID>,“<topic1>”,<qos1>[,“<topic2>”,<qos2>…]

AT+QMTSUB=0,1, “Test”,0
OK
+QMTSUB: 0,1,0,0
+QMTRECV: 0,0, “Test”, “Publish from MQTT Explorer in HPC-8300”

Disconnect a client to MQTT Server

AT+QMTDISC=<client_idx>

AT+QMTDISC=0
OK

Close a network for MQTT client

AT+QMTCLOSE=<client_idx>

AT+QMTCLOSE=0
OK

Deactivate a PDP Context

AT+QIDEACT=<contextID>

AT+QIDEACT=1
OK


MOBITEK Q25 SETTINGS — FAVORIOT

  • Remote Host: mqtt.favoriot.com
  • Remote Port: 1883
  • User Name: ***
  • User Password: ***
  • Subscribe Topic: XYoUfrDZ8mzvHNKJAtkLIvVBOw23dGnb/v2/streams/status
  • Publish Topic: XYoUfrDZ8mzvHNKJAtkLIvVBOw23dGnb/v2/streams


AT COMMANDS — FAVORIOT

DESCRIPTION AT COMMAND

Configure Parameters of a TCP/IP Context

AT+QICSGP=<contextID>,<context_type>,<APN>,<username>,<password>, <authentication>

Parameter:

  • <contextID> – Integer type. The context ID. The range is 1-16.
  • <context_type> – Integer type. The protocol type:
    • 1 – IPV4
    • 2 – IPV4V6
  • <APN> – String type. The access point name.
  • <username> – String type. The username.
  • <password> – String type. The password.
  • <authentication> – Integer type. The authentication methods:
    • 0 – NONE
    • 1 – PAP
    • 2 – CHAP
    • 3 – PAP or CHAP
AT+QICSGP=1,1,”yoodo”,””,””,1
OK

Activate a PDP Context

AT+QIACT=<contextID>

AT+QIACT=1

AT+QIACT?
+QIACT: 1,1,1,”10.*.*.*”

Configure receiving mode when data is received from server

AT+QMTCFG=“recv/mode”,<client_idx>,<msg_recv_mode>, <msg_len_enable>

Parameter:

  • <client_idx> – Integer type. MQTT client identifier. The range is 0-5.
  • <msg_recv_mode> – Integer type. Configure the MQTT message receiving mode:
    • 0 – MQTT message received from server will be contained in URC.
    • 1 – MQTT message received from server will not be contained in URC.
  • <msg_len_enable>
    • 0 – Length of MQTT message received from server will not be contained in URC.
    • 1 – Length of MQTT message received from server will be contained in URC.
AT+QMTCFG=“recv/mode”,0,0,1

+QMTCFG: “recv/mode”,0,1

OK

Open a network for MQTT client

AT+QMTOPEN=<client_idx>,“<host_name>”,<port>

Parameter:

  • <client_idx> – Integer type. MQTT client identifier. The range is 0-5.
  • <host_name> – String type. The address of the server. It could be an IP address or a domain name. The maximum size is 100 bytes.
  • <port> – Integer type. The port of the server. The range is 1-65535.
AT+QMTOPEN=0,”mqtt.favoriot.com”,1883
OK
+QMTOPEN: 0,0

AT+QMTOPEN?

+QMTOPEN: 0,”mqtt.favoriot.com”,1883
OK

Connect a client to MQTT Server

AT+QMTCONN=<client_idx>,“<clientID>”,“<username>”,“<password>”

Parameter:

  • <client_idx> – Integer type. MQTT client identifier. The range is 0-5.
  • <clientID> – String type. The client identifier string.
  • <username> – String type. User name of the client. It can be used for authentication.
  • <password> – String type. Password corresponding to the user name of the client. It can be used for authentication.
AT+QMTCONN=0,”Q25″, “***”, “***”
OK
+QMTCONN: 0,0,0

Publish messages

AT+QMTPUBEX=<client_idx>,<msgID>,<qos>,<retain>,“<topic>”,<msg_length>

Parameter:

  • <client_idx> – Integer type. MQTT client identifier. The range is 0-5.
  • <msgID> – Integer type. Message identifier of packet. The range is 0-65535. It will be 0 only
    when <qos>=0.
  • <qos> – Integer type. The QoS level at which the client wants to publish the messages.
    • 0 – At most once
    • 1 – At least once
    • 2 – Exactly once
  • <retain> – Integer type. Whether or not the server will retain the message after it has been
    delivered to the current subscribers.

    • 0 – The server will not retain the message after it has been delivered to the
      current subscribers
    • 1 – The server will retain the message after it has been delivered to the current
      subscribers
  • <topic> – String type. Topic that needs to be published.
  • <msg_length> – Integer type. Length of message to be published.
AT+QMTPUBEX=0,0,0,0, “XYoUfrDZ8mzvHNKJAtkLIvVBOw23dGnb/v2/streams”,30
> Q25 send from Hyper Terminal
OK
+QMTPUBEX: 0,0,0

Subscribe to Topics

AT+QMTSUB=<client_idx>,<msgID>,“<topic1>”,<qos1>[,“<topic2>”,<qos2>…]

Parameter:

  • <client_idx> – Integer type. MQTT client identifier. The range is 0-5.
  • <msgID> – Integer type. Message identifier of packet. The range is 1-65535.
  • <topic> – String type. Topic that the client wants to subscribe to or unsubscribe from.
  • <qos> – Integer type. The QoS level at which the client wants to publish the messages:
    • 0 – At most once
    • 1 – At least once
    • 2 – Exactly once
AT+QMTSUB=0,0, “XYoUfrDZ8mzvHNKJAtkLIvVBOw23dGnb/v2/streams”,0
OK
+QMTSUB: 0,0,0,0
+QMTRECV: 0,0, “XYoUfrDZ8mzvHNKJAtkLIvVBOw23dGnb/v2/streams”,38, “Publish from MQTT Explorer in HPC-8300″

+QMTRECV: 0,0,”XYoUfrDZ8mzvHNKJAtkLIvVBOw23dGnb/v2/streams”,46, “Publish from MQTT Explorer in Taufiq’s desktop”

Close a network for MQTT client

AT+QMTCLOSE=<client_idx>

Parameter:

  • <client_idx> – Integer type. MQTT client identifier. The range is 0-5.
AT+QMTCLOSE=0

OK


How to Change the Baud Rate of MOBITEK Q25 4G Modem

  1. By default, the baud rate for MOBITEK Q25 is “115200”.
  2. To change the baud rate of MOBITEK Q25 to another value and save it as default, MOBITEK Q25 needs to be connected to the PC using serial cable.
  3. Open Hyper Terminal, connect MOBITEK Q25 using “COM1” and set the baud rate to “115200”.
  4. Type “AT” in Hyper Terminal. If the response is “OK” then MOBITEK Q25 is successfully connected. If nothing can be entered in Hyper Terminal , then unplug and replug the serial cable to the serial port of the PC until “OK” is shown.
  5. In this example, the baud rate will be changed to “9600”. To do this, type “AT+IPR=9600;&W” in Hyper Terminal.

  6. At this point, nothing can be typed in Hyper Terminal because the baud rate setting has been changed from “115200” to “9600”.
  7. Disconnect MOBITEK Q25 from Hyper Terminal.
  8. Go to “File” -> “Properties”. In “Properties”, click on “Configure”. In “Port Settings”, change the baud rate to “9600”.
  9. Connect the MOBITEK Q25 to Hyper Terminal again. Enter “AT” and query the baud rate command. The baud rate should be changed to “9600”.

How to Build a Release Version of VB.Net Application and How to Publish VB.Net Application

Conclusion

  1. Using Microsoft Visual Basic 2008 Express to build (publish) an installer (setup.exe), there are many limitations:-
    1. unable to specify the path to install files; by default it install the exe file into “..\AppData\Local\Apps” folder
    2. no “Uninstall” shortcut/icon
  2. Therefore, we will not use Microsoft Visual Basic 2008 Express to build an installer file (setup.exe).

How to Build a Release Version

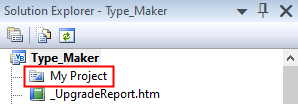
  1. Double-click on”My Project”.
  2. Go to “Compile” and set the “Build output path”.
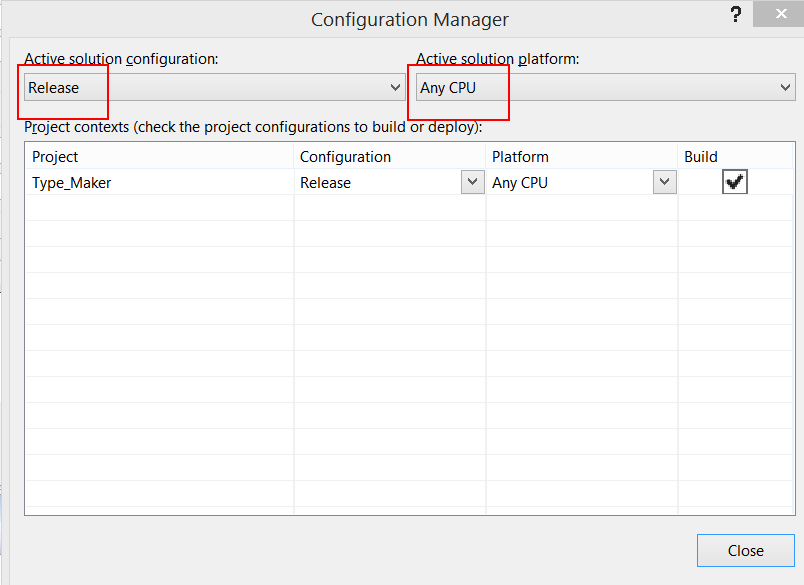
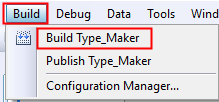
  3. Goto “Build -> Configuration Manager”.
  4. Select “Release” and “Any CPU”.
  5. Goto “Build -> Build Type_Maker”.
  6. The build or release folder is located at the path that has been set in the “Build output path” which is “bin\”.
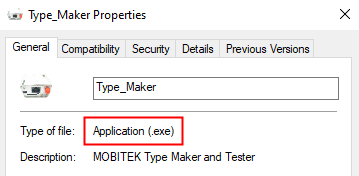
  7. The build application is “Type_Maker.exe”.


How to Publish VB.Net Application

Publish means to create a set-up file (installer).

  1. Go to “Build” -> “Configuration Manager”.
  2. Specify the “Active solution configuration” and “Active solution platform”. Close the Configuration Manager.
  3. Go to “Build” and “Build Type_Maker”.
  4. Go to “Solution Explorer” and double-click on “My Project”.
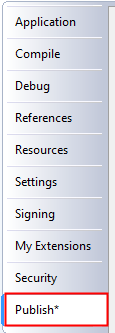
  5. Click “Publish” tab.
  6. In “Install Mode and Settings”, select “The application is available offline as well (launchable from Start menu)”.
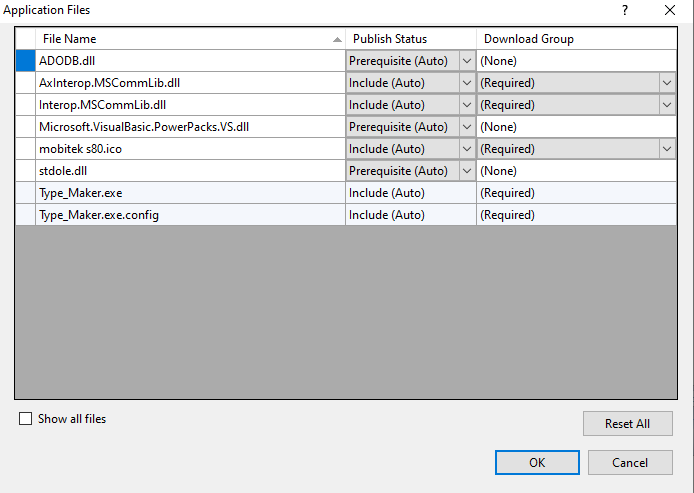
  7. Click “Application Files…” and set the list of files that will be included in the installation.
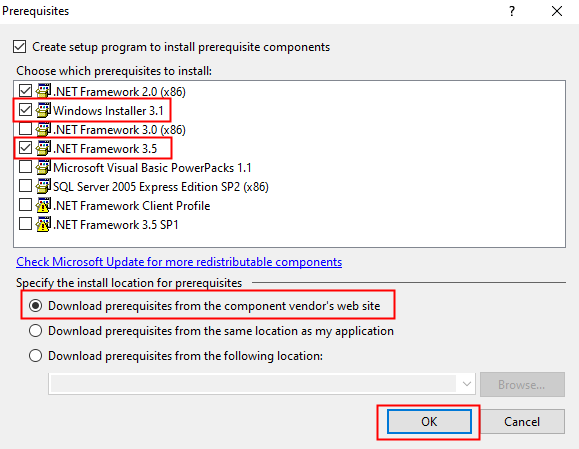
  8. Click “Prerequisites…” and set as below:
  9. Click “Publish Wizard” button.
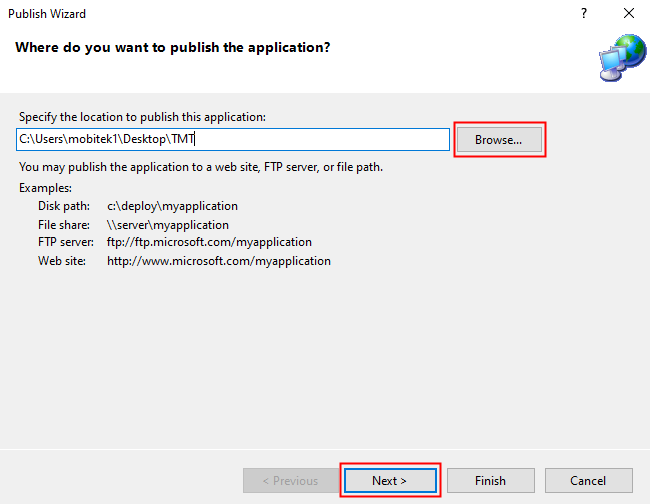
  10. Specify the location to publish the application. Click “Next”.
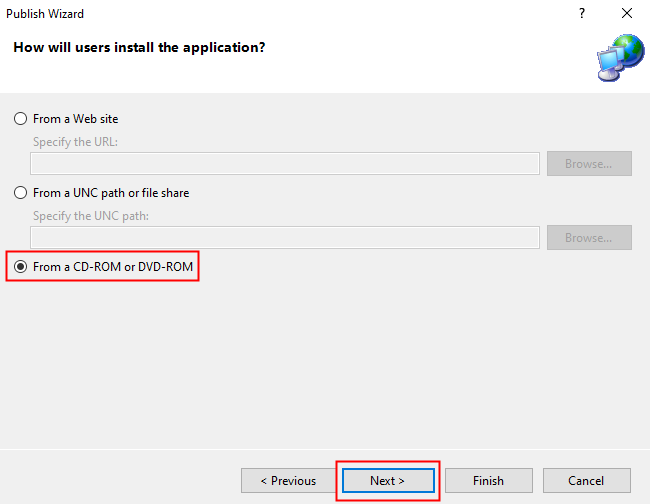
  11. Select “From a CD-ROM or DVD-ROM”. Click “Next”.
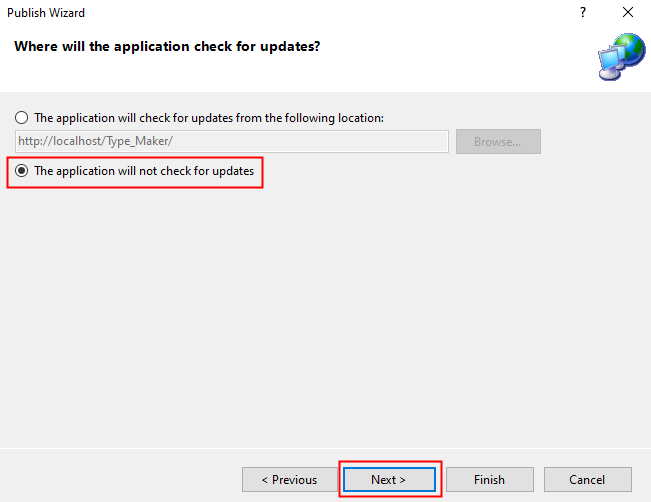
  12. Select “The application will not check for updates” and click “Next”.
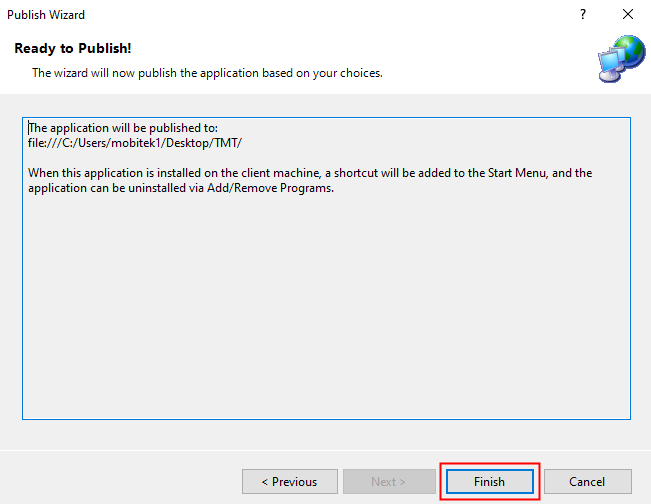
  13. Click “Finish” to publish the application.
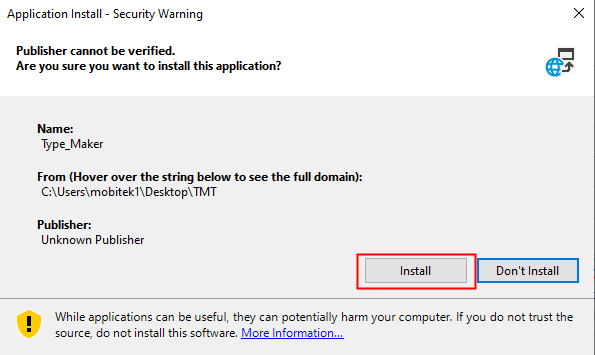
  14. After the publish completed, the saved folder will be opened automatically. Double-click on the “setup.exe” file to install the application and click “Install”.

Different Grid Type in PHPRunner

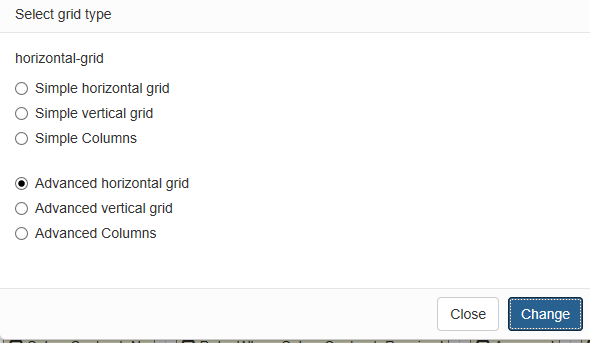
  1. The difference of grid type as shown in table below.
  2. There is no difference between “advance” and “simple” in terms of web UI. The difference is in the “Designer” tab of PHPRunner.
    GRID TYPE

    WEB UI
    horizontal grid
    vertical grid
    columns

Renaming Column Name will Affect PHPRunner

If column name is renamed via PHPMyAdmin or PHPRunner, the records will be missing from the list page (tellow table) despite there are 3528 records:-


The following solutions DOES NOT work:-

  1. Remove all fields in stock card’s list page and add them all again.
  2. Delete current list page and add a new list page.
  3. Remove the table and add it again.


The only solution is to re-build the PHP project from scratch.

The possible root cause is the PHP project was built using old version (e.g. version 10.3) or trial version of PHPRunner. Then column name is renamed in the new version of PHPRunner, e.g. version 10.4.