- Use “Advance IP Scanner”

to scan for a free IP address on LAN. The free IP address will be assigned to MOBITEK S80 Modem later. - Disconnect MOBITEK S80 Modem from LAN.
- Directly connect MOBITEK S80 Modem with laptop/PC through LAN port/cable.
- Run “USR-TCP”,
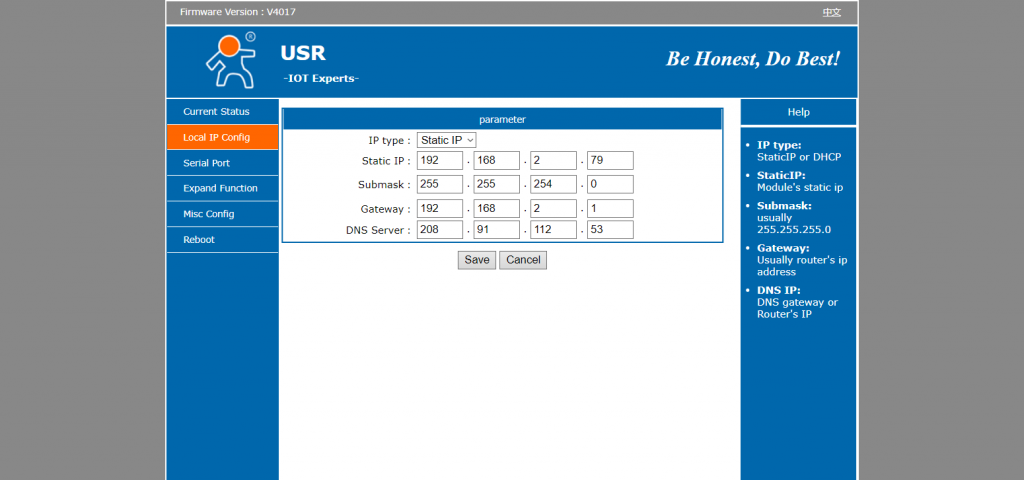
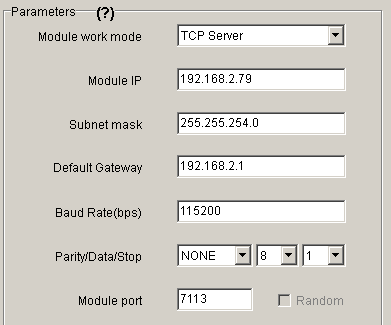
Assign a new IP address that does not belong to any device in “Advanced IP Scanner” (step 1) to the MOBITEK S80 Modem . As well as configure the “Default Gateway”, “Subnet Mask”, etc.
- Disconnect MOBITEK S80 Modem from laptop/PC.
- Re-connect MOBITEK S80 Modem to LAN through router/switch.
- Run “USR-TCP” to detect MOBITEK S80 Modem.
- If “USR-TCP” still cannot detect MOBITEK S80 Modem then use web browser, enter the IP address of MOBITEK S80 Modem into the address bar. If a web administration page is displayed then the connection is successfully established.
- Use “USR-VCOM”

to add a COM port that links the COM port with the IP address of S80. - Use “Hyper Terminal”, connect via COM port, run “hyper terminal test”. If test is passed then S80 is working on the LAN.
Author Archives: Administrator
How to Solve Hue Games Crash After Launching
Problem: after stating the game Hue, music can be heard, but the screen stays blank (black colour). Then the game crashes. Log file shows:-
D3D shader create error for vertex shader [0x887a0005]
D3D shader create error for pixel shader [0x887a0005]
WARNING: Shader Unsupported: ‘Custom/CutoutShader’ – Pass ” has no vertex shader
WARNING: Shader Unsupported: ‘Custom/CutoutShader’ – Setting to default shader.
d3d11: failed to create 2D texture id=94 w=128 h=256 mips=1 d3dfmt=77 [887a0005]
d3d11: failed to create 2D texture view id=94 [80070057]
…
D3D shader create error for vertex shader [0x887a0005]
D3D shader create error for pixel shader [0x887a0005]
WARNING: Shader Unsupported: ‘Custom/Unlit Single Color’ – Pass ” has no vertex shader
WARNING: Shader Unsupported: ‘Custom/Unlit Single Color’ – Setting to default shader.
d3d11: failed to create 2D texture id=104 w=128 h=128 mips=8 d3dfmt=77 [887a0005]
d3d11: failed to create 2D texture view id=104 [80070057]
D3D shader create error for vertex shader [0x887a0005]
D3D shader create error for pixel shader [0x887a0005]
WARNING: Shader Unsupported: ‘Unlit/Transparent’ – Pass ” has no vertex shader
WARNING: Shader Unsupported: ‘Unlit/Transparent’ – Setting to default shader.
d3d11: failed to create 2D texture id=106 w=204 h=343 mips=1 d3dfmt=28 [887a0005]
d3d11: failed to create 2D texture view id=106 [80070057]
…
d3d11: attempt to lock null vertex buffer
d3d11: attempt to lock null index buffer
Unloading 6 Unused Serialized files (Serialized files now loaded: 0)
d3d11: failed to create 2D texture id=562 w=40 h=91 mips=1 d3dfmt=28 [887a0005]
d3d11: failed to create 2D texture view id=562 [80070057]
D3D shader create error for vertex shader [0x887a0005]
D3D shader create error for pixel shader [0x887a0005]
WARNING: Shader Unsupported: ‘Mobile/Particles/Alpha Blended’ – Pass ” has no vertex shader
WARNING: Shader Unsupported: ‘Mobile/Particles/Alpha Blended’ – Setting to default shader.
d3d11: failed to create 2D texture id=564 w=2048 h=2048 mips=1 d3dfmt=77 [887a0005]
d3d11: failed to create 2D texture view id=564 [80070057]
d3d11: failed to create 2D texture id=566 w=2048 h=2048 mips=1 d3dfmt=77 [887a0005]
d3d11: failed to create 2D texture view id=566 [80070057]
UnloadTime: 2.002275 ms
Unloading 10 unused Assets to reduce memory usage. Loaded Objects now: 21250.
Total: 28.089157 ms (FindLiveObjects: 0.868564 ms CreateObjectMapping: 0.596149 ms MarkObjects: 26.562433 ms DeleteObjects: 0.061582 ms)
d3d11: failed to create vertex buffer of size 12240 [0x887A0005]
d3d11: failed to create index buffer of size 612 [0x887A0005]
d3d11: attempt to lock null vertex buffer
d3d11: attempt to lock null index buffer
d3d11: failed to create vertex buffer of size 5280 [0x887A0005]
d3d11: failed to create index buffer of size 264 [0x887A0005]
d3d11: attempt to lock null vertex buffer
d3d11: attempt to lock null index buffer
d3d11: failed to create vertex buffer of size 4194304 [0x887A0005]
d3d11: failed to create vertex buffer of size 4194304 [0x887A0005]
Crash!!!
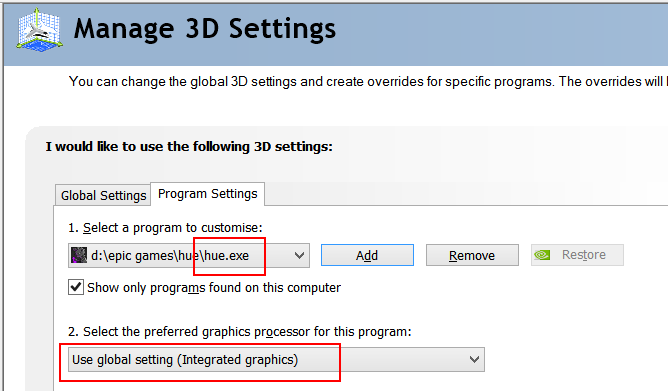
Solution: run the game using “Integrated graphics” instead of “NVIDA” by setting it in NVIDIA Control Panel -> Manage 3D Settings.
How to Solve the Problem of Epic Games Launcher Unable to Start
Problem: after upgrading NVIDA driver from v. 445.87 to v. 456.38, Epic Games Laucher cannot be opened or started, it keeps opening then close, mouse could be blinking.
Solution: right click on the Epic Games Launcher -> Run with graphics processor -> Integrated graphics
Other Solutions:-
- Epic Games Launcher displays incorrectly or appears blank
- Epic Games Launcher Not Working? Here Are 4 Solutions
How to Block Spammer or Hacker Who Always Changed the Sender’s E-Mail Address?
Spammer or hacker will always change the e-mail address to avoid being flag as spam based on the sender’s e-mail address.
Solution: block the SMTP domain of spammer or hacker by using “Global Email Filters” tool in cPanel
Where Does PHPRunner Store the Database Settings?
PHPRunner version 10.x : ConnectionManager.php
protected function _setConnectionsData()
{
// content of this function can be modified on demo account
// variable names $data and $connectionsData are important

$connectionsData = array();

$data = array();
$data["dbType"] = 0;
$data["connId"] = "Tables";
$data["connName"] = "crm2017 at 00.00.00.00";
$data["connStringType"] = "mysql";
$data["connectionString"] = "mysql;00.00.00.00;crm;scale-UP;;crm2017;;1"; //currently unused

$this->_connectionsIdByName["crm2017 at 00.00.00.00"] = "Tables";

$data["connInfo"] = array();
$data["ODBCUID"] = "crm";
$data["ODBCPWD"] = "scale-UP";
$data["leftWrap"] = "`";
$data["rightWrap"] = "`";

$data["DBPath"] = "db"; //currently unused
$data["useServerMapPath"] = 1; //currently unused

$data["connInfo"][0] = "00.00.00.00";
$data["connInfo"][1] = "crm";
$data["connInfo"][2] = "scale-UP";
$data["connInfo"][3] = "";
$data["connInfo"][4] = "crm2017";
$data["connInfo"][5] = ""; //currently unused
$data["connInfo"][6] = "1"; //currently unused
$data["ODBCString"] = "DRIVER={MySQL ODBC 5.1 Driver};Server=00.00.00.00;Uid=crm;Pwd=scale-UP;Database=crm2017;OPTION=3";
// encription set
$data["EncryptInfo"] = array();
$data["EncryptInfo"]["mode"] = 0;
$data["EncryptInfo"]["alg"] = 128;
$data["EncryptInfo"]["key"] = "";

$connectionsData["Tables"] = $data;
$this->_connectionsData = $connectionsData;
}
Differences between TC35iT, MC35iT and MC55iT/MC52iT
Summary Table — MOBITEK Modem in Linux Mint in VM and Linux Mint as Host OS
| MODEM | Linux Mint in VM | Linux Mint in Dell-D630 |
|---|---|---|
| MOBITEK S80 | MOBITEK S80 does not work (no response in CuteCom) in VM-Linux Mint | MOBITEK S80 can work in Linux Mint using USB. There are 4 COM ports created in Linux (ttyUSB0, ttyUSB1, ttyUSB2, ttyUSB3), only “ttyUSB3” is used for the AT command. |
| MOBITEK Q24 | MOBITEK Q24 is working (can send and read SMS) in VM-Linux Mint | MOBITEK Q24 also can work in Linux using “ttyUSB0” |
Renaming “Sierra Wireless” in COM Ports
Objective: to use AT command to rename “Sierra Wireless” to “MOBITEK” so that all the 4 COM ports will display “MOBITEK”
Result: after using the “AT+WUSB” to change name to “MOBITEK”, the 4 COM ports in device manager still show as “Sierra Wireless” .
In addition, there is no AT command to remove the other 3 COM ports, “CNS”, ‘DM” & “NMEA”
How To Solve Modem Cannot be Connected or Unresponsive in CuteCom Linux
Applies To: MOBITEK S80 Modem, MOBITEK Q24 Modem, Linux OS
Caused By: permission or privilege to use serial port or USB port is NOT assigned to current user.
Solution: grant permission to current user by adding “tty”, “dialout” into “Groups” of the current user.
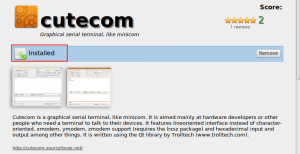
- Optional — install “Cutecom” from Software Manager.
 Click on “install”
- Go to “User and Groups”.

- Click on the current user and then click on “Groups”.

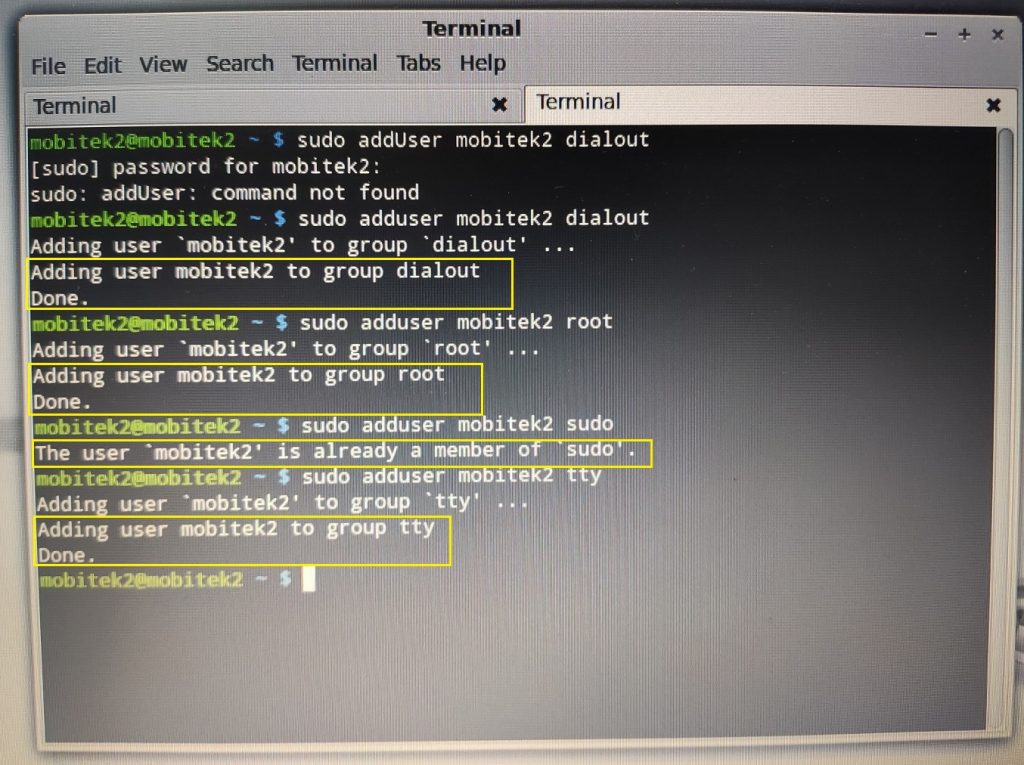
- Assign the following “Groups” or permissions to the user:-
- dialout
- root
- sudo
- tty
- Alternatively, command line can be used to add permission to the user:-
- Restart Linux.
Theme of MOBITEK Blog Has Been Changed from “Twenty Eleven” to “Twenty Tweleve” and How to Add a Search Box
Original “Twenty Tweleve” theme does not have a search box at top right corner (same row with header).
Here are the steps taken to add a search box:
- add a folder for child theme in same directory of parent theme, e.g. “/wp-content/themes”
- name the folder as “twentytwelve-child-theme”
- refer to http://zeaks.org/create-a-wordpress-child-theme/ on how to create a child theme
- all modifications are done on child theme rather on parent theme
- child theme copies/inherits all properties from parent theme
- copy “header.php” from parent theme, “twentytwelve” to child theme folder, “twentytwelve-child-theme”
- modify the “header.php” in “twentytwelve-child-theme”
- modify the “style.css” in “twentytwelve-child-theme”
- in the “Dashboard -> Appearance -> Themes”, choose the newly created child theme:
Source: http://zeaks.org/tutorials/twenty-twelve-theme-search-form-in-header/
