Author Archives: Administrator

How to Make Civilization IV Run in Windows 8.1 64-bit

Civilization IV will give you these error messages in Windows 8.1 64-bit:-

  • “The program can’t start because D3DX9_32.DLL is missing from your computer. Try reinstalling the progrom to fix the problem”; and
  • “Error loading shader libraries”

If these solutions do not work:-

  1. re-installing Civilization IV in “compatibility mode” as mentioned in Microsoft Community; or
  2. running “dxwebsetup.exe” to re-install DirectX version 9 as mentioned in Microsoft Community;

Then these will 100% solve the problems:-

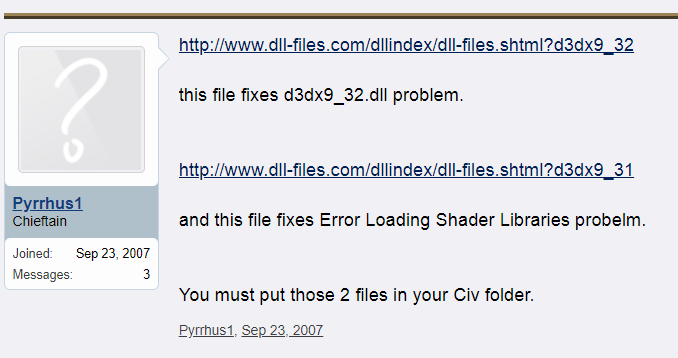
  1. download “d3dx9_32.dll”, unzip and copy to folder “C:\Windows\SysWOW64”; and
  2. download “d3dx9_31.dll”, unzip and copy to folder “C:\Windows\SysWOW64”; this dll will solve “Error loading shader libraries”

This is because Windows 8.1 64-bit does not have “d3dx9_32.dll” and “d3dx9_31.dll” by default.

Source: https://forums.civfanatics.com/threads/to-those-with-d3dx9_32-dll-problems.232577/page-3

Reasons:-

  • Windows 8.1 64-bit by default is installed with DirectX 11 and it does not have all the dll files (d3dx9_xx.dll) of DirectX 9;
  • DirectX 9 is required to run old games such as Civilization IV  that support Windows Vista and below.

How to Solve the Problem of “mcpu.exe – Application Error : The application was unable to start correctly (0xc0000142)”

Applies To:

  • MOBITEK MobiGATE Model SG-B-4-L / SG-B-8-L series (model having LAN port)
  • VCOM version older than 4.5.11


Problem: Windows applications not able to run or the whole PC/server will hang.

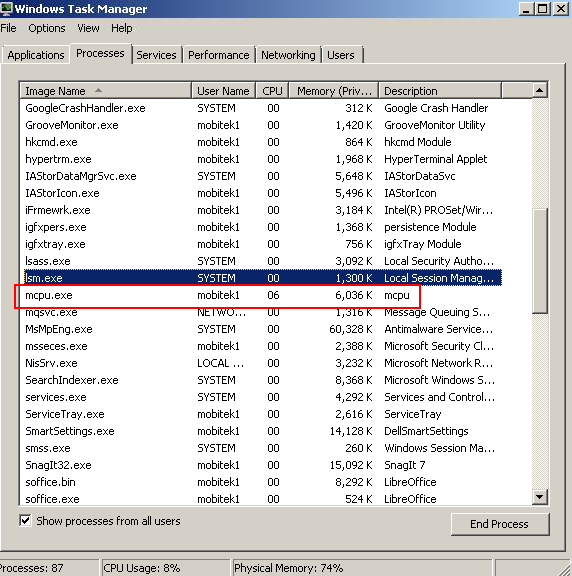
  1. In “Windows Task Managmer”, “mcpu.exe” will appear everytime VCOM connects to modem in MobiGATE then will disappear:-
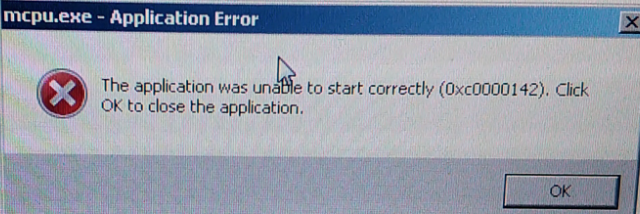
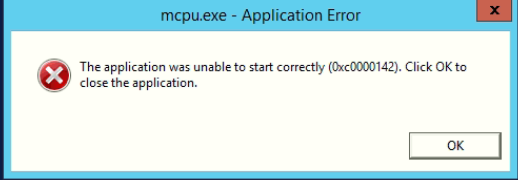
  2. After running VCOM for few days, Windows will show an error message “mcpu.exe – Application Error : The application was unable to start correctly (0xc0000142)”:-
  3. “Windows Task Manager” shows high memory usage:-
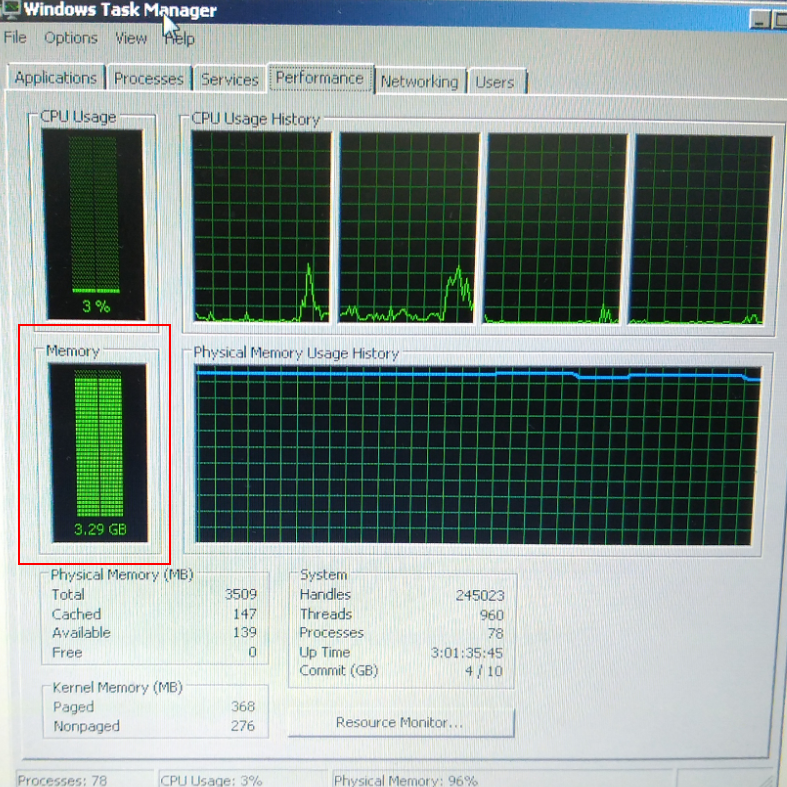
  4. This will caused other Windows applications not able to run or the whole PC/server will hang:-
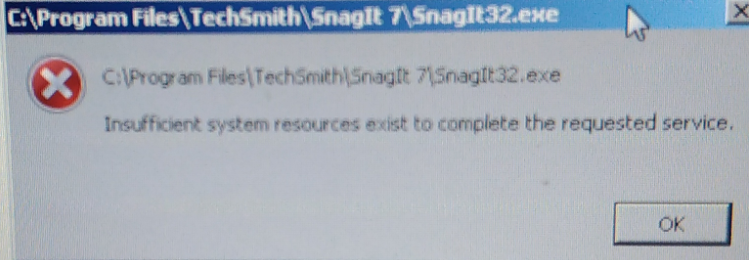
 

Solution: VCOM version older than 4.5.11 has memory leak, causing high memory usage. Therefore, need to install version 4.5.11.
How to Recover From Ransomware Attack

1st Attack: 2019-Nov-20

2nd Attack: 2020-Jan-9, encrypted file with “Harma” suffix

  1. Shut down all PCs on the network.
  2. Disconnect all LAN/ethernet cable from all PCs to prevent any LAN or internet connection.
  3. A PC is infected by ransomware if the files in the PC are encrypted and cannot be opened.
  4. One by one, connect each PC to internet, update virus definition of Windows Defender (or anti-virus software) and run full scan.
  5. Take note of the date and time the files are encrypted on all PCs.
  6. The PC having encrypted files with the earliest date & time is the 1st PC being infected.
  7. On another clean PC that is not connected to the LAN, run full scan on the back-up files and Windows image files that were created by Windows Backup.
    1. If you do not have any back-up of files and a recent copy Windows image file before the attack then recovering from ransomware attack is impossible.
  8. Once the back-up files are scanned and certified clean, then back up a copy of all back-up files and Windows image onto a separate external hard disk.
    1. In case the back-up files and Windows image files are infected when doing restore, you still have a back up copy.
  9. After all PCs are scanned and cleaned by Windows Defender (or any anti-virus software), one by one:-
    1. restore each PC using Windows image that is dated earlier then the date of ransomware attack.;
    2. run Windows update to update all Windows securities (KB);
    3. using Windows Defender (or any anti-virus software) to run a full scan to ensure that there is no trace of ransomware after Windows has been restored;
    4. then finally restore all files that are encrypted by ransomware from Windows Backup.
  10. DO NOT connect all PCs to the LAN at the same time.
  11. One by one, connect PCs to LAN and internet, monitor if there are any files that are encrypted. If there are none, then connect another PC to the LAN. Repeat until all PCs are connected to LAN and internet.


PREVENTION

  1. Usually, ransomware is an attachment in e-mail and if e-mail has been identified has the entry of attack, then change the e-mail address.
  2. Enable e-mail redirection for non-spam mail to the new e-mail address.
  3. Delete the old e-mail address that is constantly being attacked by spammer when all customers, suppliers, etc. has been notified on the new e-mail address.
  4. Configure e-mail client, e.g. Thunderbird:-
    1. NOT to download or retrieve all contents of e-mail;
    2. set to download e-mail without any attachment or only the header of e-mail only;
    3. if the e-mail is from a known sender, then only download the full message with attachment.


SECURITY

  1. Avoid running PC in 24 hours x 7 days, set PC to sleep or shut down at 10 pm every night and wake up at 8 am every morning:-
    1. use Task Scheduler to put PC to sleep at night;
    2. use BIOS setting to boot up PC in morning or use Task Scheduler to wake-up PC.
      1. if using Task Scheduler, ensure that  “Allow wake timers” is enabled
  2. Change the RDP port number after recover from a ransomware attack.
  3. Set anti-virus software to perform a full scan  everyday instead of quick scan on PC.
  4. Remove all user accounts of Windows and replace them with new user accounts as hacker may have obtain the Windows user account.
  5. Review Windows Firewall — remove any unused applications or ports.
  6. For SERVERLINK:-
    1. configure Brute Force

    2. set time period to allow external RDP connection in Working Hours

    3. enable Ransomware feature
    4. set Homeland to only allow IP address from home country


BACK-UP PROCEDURE

  1. Create a back up policy that back up files and Windows image in these locations:-
    1. external hard disk that is connected on LAN;
    2. cloud or web hosting that is connected via internet;
    3. removable external hard disk that is NOT connected on LAN or internet.
  2. Back up all files using Windows Backup on daily basis to external hard disk that is connected on LAN.
  3. Save Windows Image using Windows Backup on weekly basis or daily basis to external hard disk that is connected on LAN.
  4. Back up all files in external hard disk to cloud (Drop Box, One Drive, etc.) or to web hosting server that is connected via internet.
  5. Back up all files in external hard disk that is connected on LAN to removable external hard disk that is disconnected from LAN and internet.
  6. Here is a list of useful back up softwares:-
    1. EastTec Backup
    2. SyncBack
    3. CarotDav

How to Solve LibreOffice Crashing When Printing Document that has Image

Problem: LibreOffice crashed when printing document that has image. Non-image document is not affected.

Applies to:

  • all version of LibreOffice from version 5 and above. Version 4 and below are not affected
  • printer model Fuji Xerox CP 05 b

Solution: download the latest printer driver from printer’s manufacturer and use the latest version. In our case, the latest driver is version 2.6.19.0 from FujiXerox web site.

How to Run VCOM as Windows Service Using “AlwaysUp”

VCOM

VCOM is a Windows Application. It is NOT a Windows Service. VCOM will auto-run when user has logged into (entering user name and password) Windows. Otherwise, VCOM will not run.

To run VCOM as a Windows Service you can install a 3rd party software call “AlwaysUp”.


Install & Configure VCOM in AlwaysUp

  1. Download “AlwaysUp” here … or from 3rd party web site ….
  2. Install it.
  3. Add a new service.
  4. Point to the path of “vcom.exe”.
  5. Ensure the status is “Automatic”.
  6. To view the GUI of VCOM, click on “Switch to Session 0”.
    then it will display the VCOM GUI:
  7. To return to Windows desktop from VCOM GUI, click “Return now”.


Warning

  1. After VCOM service is started by AlwaysUp, sometimes, this message by “Interactive Services Detection” will appear “A program running on this computer is trying to display a message”:
    click on “View Message” to switch to VCOM GUI:

  2. To return to Windows desktop from VCOM GUI, click “Return now”.