- In this example, we are going to move the Windows Server 2012 64-bit virtual machine (VirtualBox) that is stored in “C:” drive to another hard disk (external or on the local network).
- Go to default location where VirtualBox save “.vbox”. The default location is “C:\..\VirtualBox VMs”.
- Move (cut and paste) the whole folder to another hard disk (external or on the local network).
- Then in VirtualBox, go to “Tools”, and click “Add”.

- Locate the folder that you just moved. Select the file that has the extension “.vbox”.

- Click “Start”, VirtualBox is running a Windows Server 2012 64-bit virtual machine that is on another hard disk.

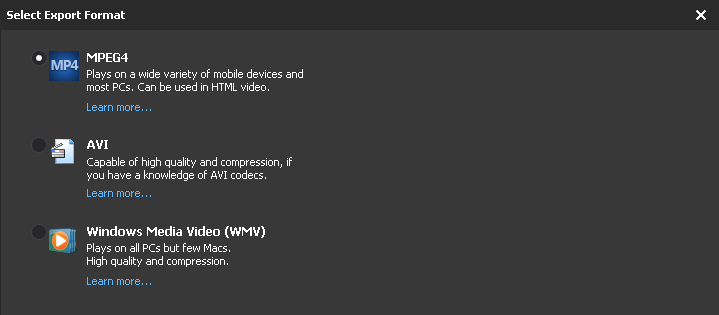
DO NOT use BB Flashback to Convert Video to “.mp4” format as it is Actually MPEG4 Format
How to Run MOBITEK STK API v. 6.5 Sample Code in Visual Studio 2015
- Install STK API v. 6.5 using “Setup-MOBITEK STK API version 6.5.exe”.
- Run “SIM Tool Kit.vb”.

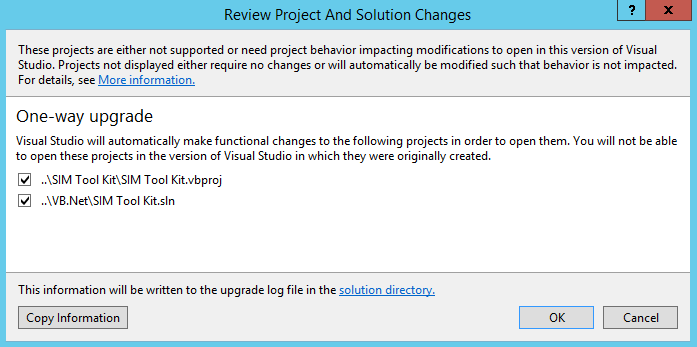
- Click OK in prompt dialog to migrate the project to Visual Studio 2015 project.
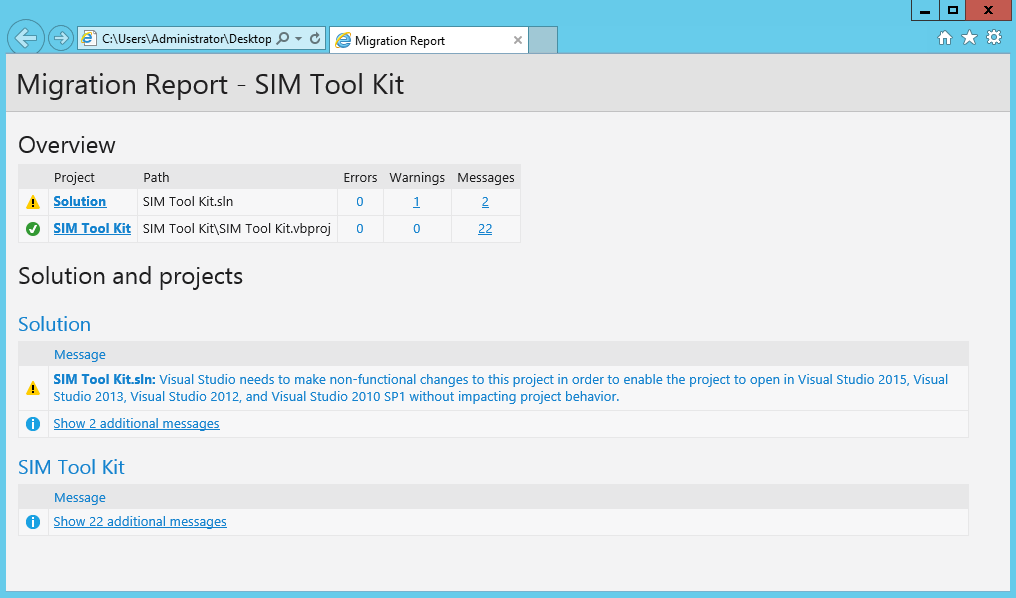
- After migration completed, the migration report will appear.
- In Visual Studio 2015, select “x86” in the dropdown, click “Start” to run the project.

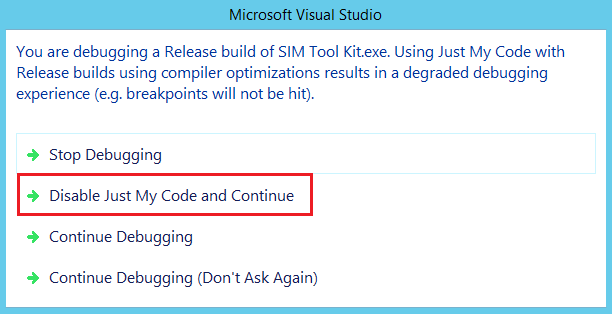
- If prompted the below dialog, select “Disable Just My Code and Continue”.
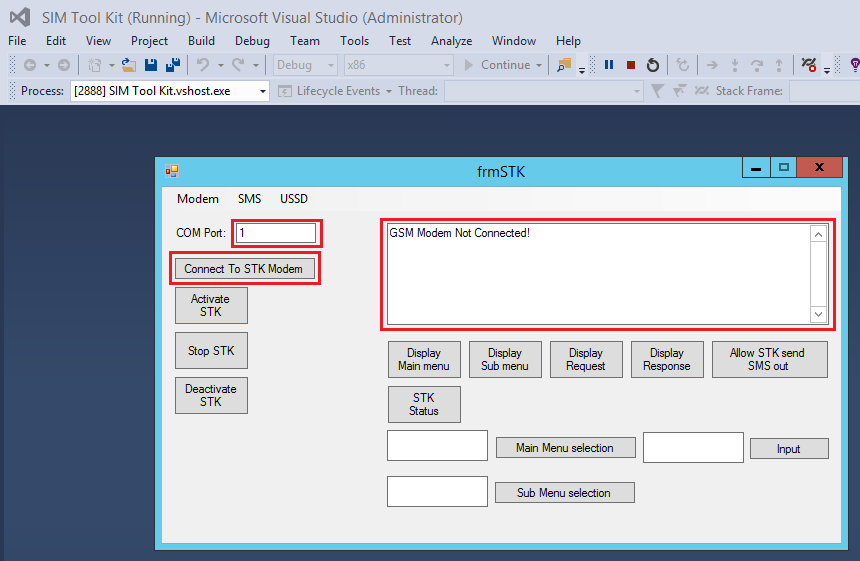
- To test the project, insert any number in “COM Port” text box and click “Connect to STK Modem” button. If the text appear in the text box and there is no runtime error, then the project is running fine.
Email Inspector Is Unable To Determine Whether an E-mail Address is Valid Or Not
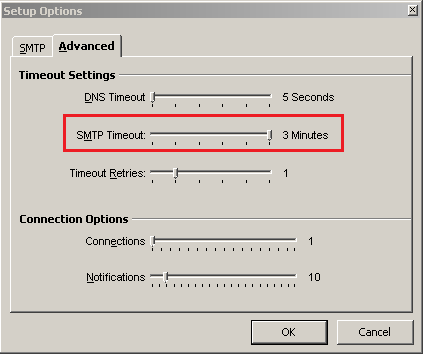
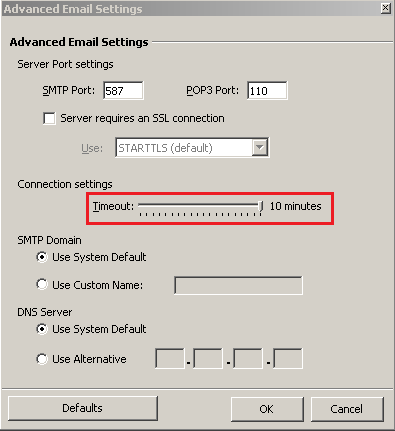
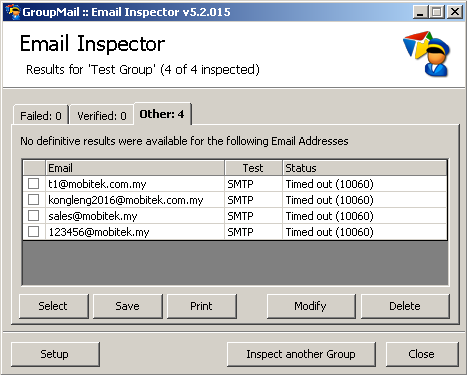
Conclusion: Email Inspector is unable to determine whether an e-mail address is valid or not.
| TROUBLESHOOT | SOLVED? |
| No. All emails tested with Email Inspector go to “Other” tab.
Result was:
By right:
|
|
| No. All emails tested with Email Inspector go to “Other” tab.
Result was:
By right:
|
|
| No. All emails tested with Email Inspector go to “Other” tab.
Result was:
By right:
|
|
| No. All emails tested with Email Inspector go to “Other” tab.
Result was:
By right:
|
How to Solve USR-TCP Cannot Detect MOBITEK S80 Modem on LAN
- Use “Advance IP Scanner”

to scan for a free IP address on LAN. The free IP address will be assigned to MOBITEK S80 Modem later. - Disconnect MOBITEK S80 Modem from LAN.
- Directly connect MOBITEK S80 Modem with laptop/PC through LAN port/cable.
- Run “USR-TCP”,
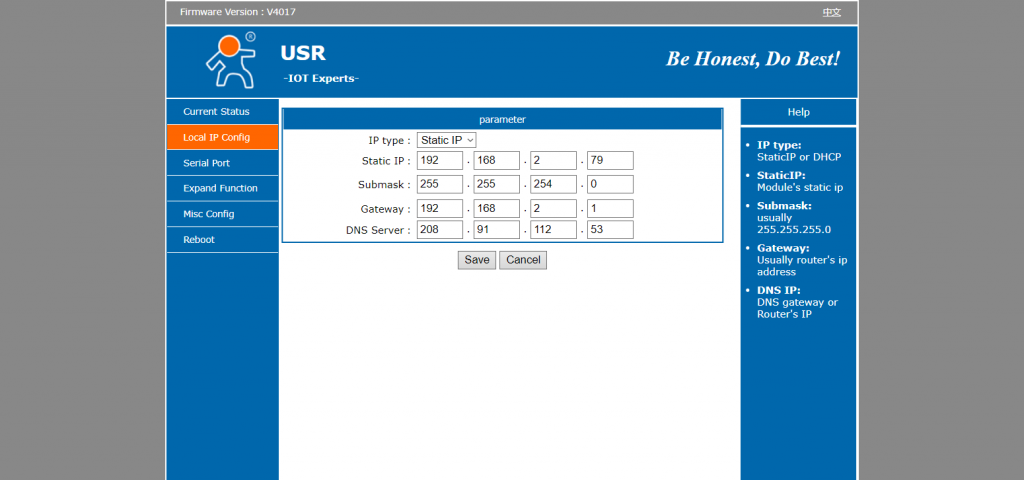
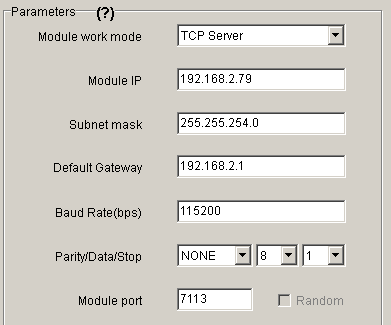
Assign a new IP address that does not belong to any device in “Advanced IP Scanner” (step 1) to the MOBITEK S80 Modem . As well as configure the “Default Gateway”, “Subnet Mask”, etc.
- Disconnect MOBITEK S80 Modem from laptop/PC.
- Re-connect MOBITEK S80 Modem to LAN through router/switch.
- Run “USR-TCP” to detect MOBITEK S80 Modem.
- If “USR-TCP” still cannot detect MOBITEK S80 Modem then use web browser, enter the IP address of MOBITEK S80 Modem into the address bar. If a web administration page is displayed then the connection is successfully established.
- Use “USR-VCOM”

to add a COM port that links the COM port with the IP address of S80. - Use “Hyper Terminal”, connect via COM port, run “hyper terminal test”. If test is passed then S80 is working on the LAN.
UCanAccess Driver Locks MS Access Database of SMS Engine — Basic Edition
Problem: SMS stuck in the “oubox” table and cannot be send out by SMS Engine — Basic Edition v. 5 and SMS Engine — Basic Edition v. 6.
Solution: Java application should use ODBC instead of UCanAccess to connect to “SMSEngine5.mdb” (version 5) or “SMSEngineVBNET.mdb” (version 6). Somehow, UCanAccess locks the records inserted into “outbox” table, preventing SMS Engine from retrieving those records and preventing SMS being send out.
TROUBLE SHOOTING #1: JDBC:UCanAccess
- DB Tool: DBeaver
- Driver: UCanAccess
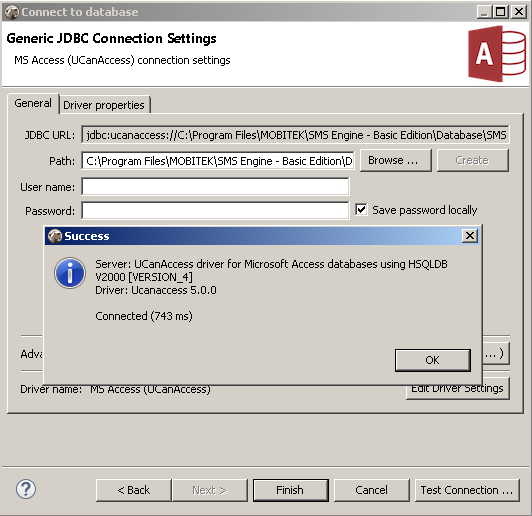
- JDBC URL: jdbc:ucanaccess://C:\Program Files\MOBITEK\SMS Engine – Basic Edition\Database\SMSEngine5.mdb
- Result:
TROUBLE SHOOTING #2: JDBC:ODBC
How to Connect to MS Access Database using JDBC:ODBC Connection
- Depending on whether your Java application is 32-bit or 64-bit, choose the correct ODBC Data Source Administrator (64bit or 32 bit) to create the Data Source Name. Otherwise, the connection cannot be established.
-
- If your Java application is 64-bit then use ODBC Data Source Administrator 64-bit
- If your Java application is 32-bit then use ODBC Data Source Administrator 32-bit
-
- Open ODBC Data Source Administrator (make sure the correct version is used).
- Select “System DSN” tab. Click “Add”.

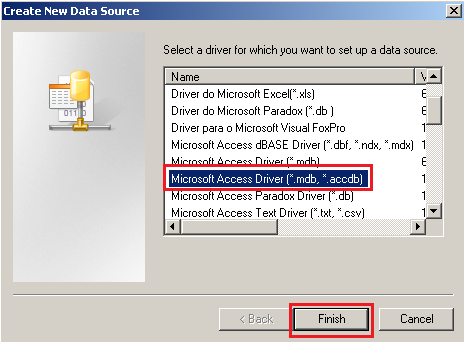
- In this example, we are connecting to MS Access database, in “Create New Data Source”, select “Microsoft Access Driver (*.mdb, *.accdb)” in the list. Click “Finish”.
- In “ODBC Microsoft Access Setup”, enter any “Data Source Name”. This name will be used in DBeaver later. So remember it. After that click “Select…” button.
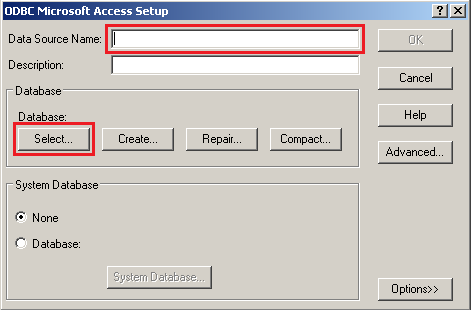
- Now you have to locate your MS Access file. In this example we use “SMSEngine5.mdb”. Click “OK”.
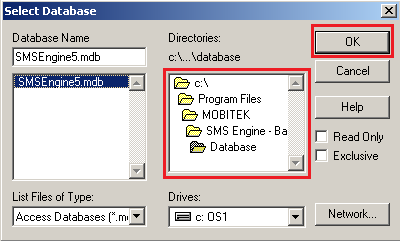
- Example of the Data Source Name created.
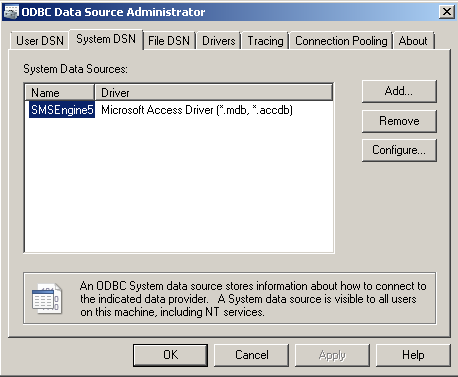
- Open DBeaver (or any other database management tool). Click on “Database -> New Database Connection”
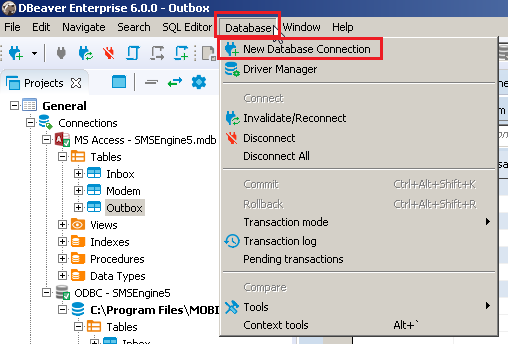
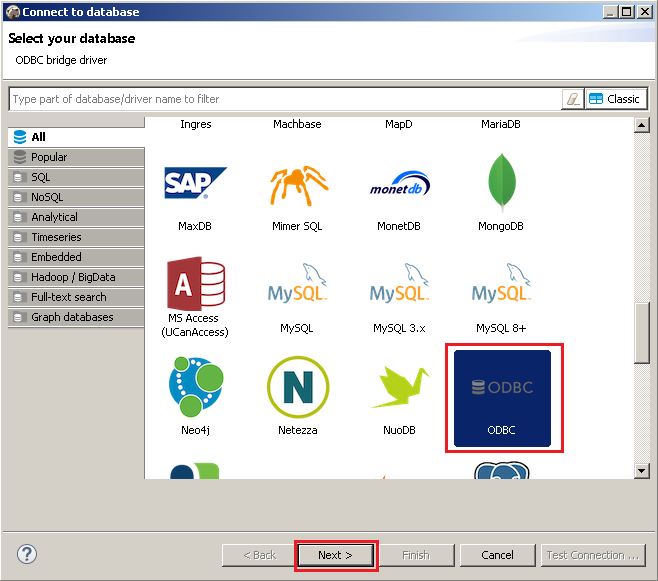
- In “Connect to database”, select “ODBC” in the list. Click “Next”
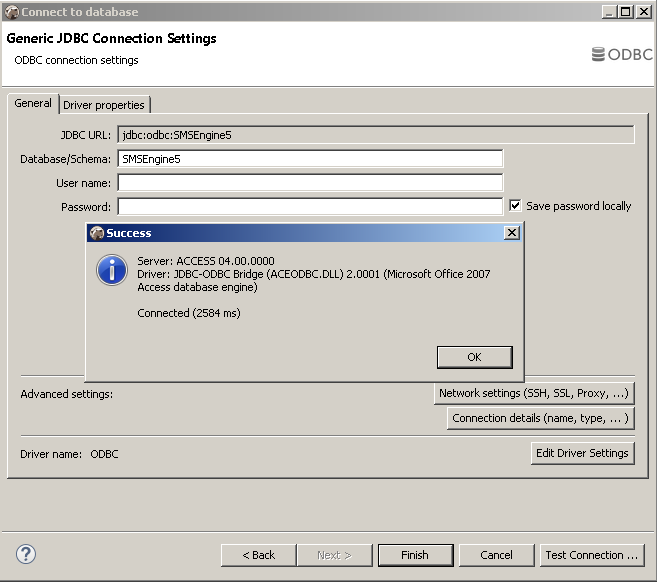
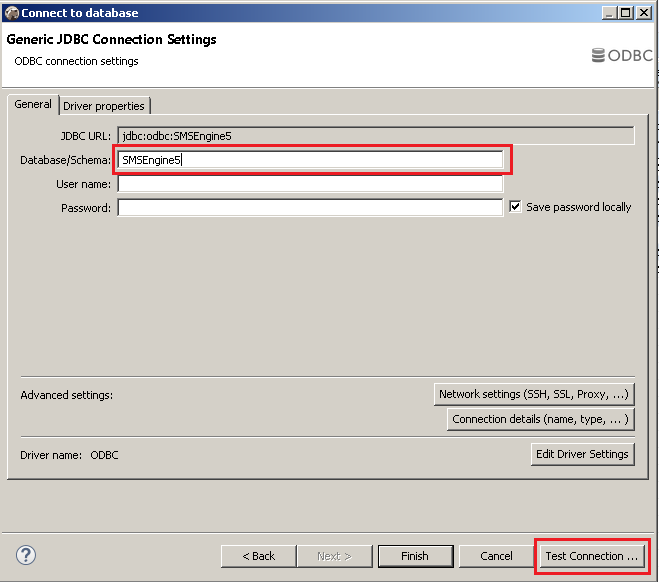
- Insert “Database/Schema” name the same like you created earlier in ODBC Data Source Administrator. Click “Test Connection” to test the ODBC connection.
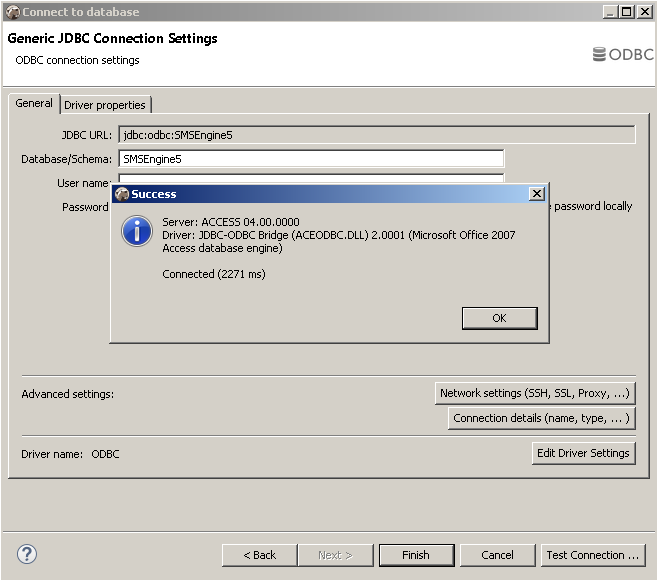
- If everything is setup right, you will get the below message. Click “Finish”
How to Solve Hue Games Crash After Launching
Problem: after stating the game Hue, music can be heard, but the screen stays blank (black colour). Then the game crashes. Log file shows:-
D3D shader create error for vertex shader [0x887a0005]
D3D shader create error for pixel shader [0x887a0005]
WARNING: Shader Unsupported: ‘Custom/CutoutShader’ – Pass ” has no vertex shader
WARNING: Shader Unsupported: ‘Custom/CutoutShader’ – Setting to default shader.
d3d11: failed to create 2D texture id=94 w=128 h=256 mips=1 d3dfmt=77 [887a0005]
d3d11: failed to create 2D texture view id=94 [80070057]
…
D3D shader create error for vertex shader [0x887a0005]
D3D shader create error for pixel shader [0x887a0005]
WARNING: Shader Unsupported: ‘Custom/Unlit Single Color’ – Pass ” has no vertex shader
WARNING: Shader Unsupported: ‘Custom/Unlit Single Color’ – Setting to default shader.
d3d11: failed to create 2D texture id=104 w=128 h=128 mips=8 d3dfmt=77 [887a0005]
d3d11: failed to create 2D texture view id=104 [80070057]
D3D shader create error for vertex shader [0x887a0005]
D3D shader create error for pixel shader [0x887a0005]
WARNING: Shader Unsupported: ‘Unlit/Transparent’ – Pass ” has no vertex shader
WARNING: Shader Unsupported: ‘Unlit/Transparent’ – Setting to default shader.
d3d11: failed to create 2D texture id=106 w=204 h=343 mips=1 d3dfmt=28 [887a0005]
d3d11: failed to create 2D texture view id=106 [80070057]
…
d3d11: attempt to lock null vertex buffer
d3d11: attempt to lock null index buffer
Unloading 6 Unused Serialized files (Serialized files now loaded: 0)
d3d11: failed to create 2D texture id=562 w=40 h=91 mips=1 d3dfmt=28 [887a0005]
d3d11: failed to create 2D texture view id=562 [80070057]
D3D shader create error for vertex shader [0x887a0005]
D3D shader create error for pixel shader [0x887a0005]
WARNING: Shader Unsupported: ‘Mobile/Particles/Alpha Blended’ – Pass ” has no vertex shader
WARNING: Shader Unsupported: ‘Mobile/Particles/Alpha Blended’ – Setting to default shader.
d3d11: failed to create 2D texture id=564 w=2048 h=2048 mips=1 d3dfmt=77 [887a0005]
d3d11: failed to create 2D texture view id=564 [80070057]
d3d11: failed to create 2D texture id=566 w=2048 h=2048 mips=1 d3dfmt=77 [887a0005]
d3d11: failed to create 2D texture view id=566 [80070057]
UnloadTime: 2.002275 ms
Unloading 10 unused Assets to reduce memory usage. Loaded Objects now: 21250.
Total: 28.089157 ms (FindLiveObjects: 0.868564 ms CreateObjectMapping: 0.596149 ms MarkObjects: 26.562433 ms DeleteObjects: 0.061582 ms)
d3d11: failed to create vertex buffer of size 12240 [0x887A0005]
d3d11: failed to create index buffer of size 612 [0x887A0005]
d3d11: attempt to lock null vertex buffer
d3d11: attempt to lock null index buffer
d3d11: failed to create vertex buffer of size 5280 [0x887A0005]
d3d11: failed to create index buffer of size 264 [0x887A0005]
d3d11: attempt to lock null vertex buffer
d3d11: attempt to lock null index buffer
d3d11: failed to create vertex buffer of size 4194304 [0x887A0005]
d3d11: failed to create vertex buffer of size 4194304 [0x887A0005]
Crash!!!
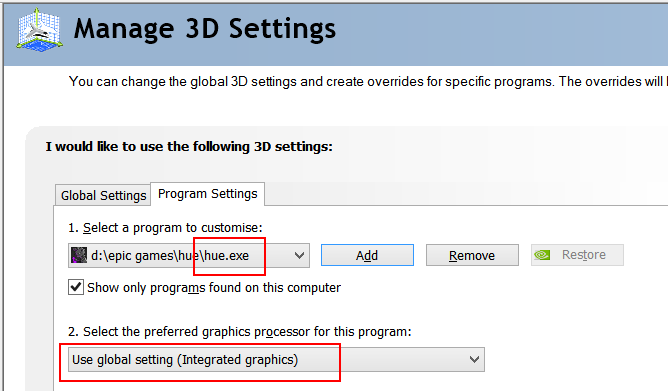
Solution: run the game using “Integrated graphics” instead of “NVIDA” by setting it in NVIDIA Control Panel -> Manage 3D Settings.
How to Solve the Problem of Epic Games Launcher Unable to Start
Problem: after upgrading NVIDA driver from v. 445.87 to v. 456.38, Epic Games Laucher cannot be opened or started, it keeps opening then close, mouse could be blinking.
Solution: right click on the Epic Games Launcher -> Run with graphics processor -> Integrated graphics
Other Solutions:-
- Epic Games Launcher displays incorrectly or appears blank
- Epic Games Launcher Not Working? Here Are 4 Solutions
How to Solve “ERROR [HYT00][Microsoft][ODBC SQL Server Driver]Query timeout expired”
PROBLEM: ERROR [HYT00][Microsoft][ODBC SQL Server Driver]Query timeout expired
POSSIBLE CAUSE: Database too large, too many records in tables
SOLUTION: Create an index for “outbox” table:-
- Stop the SMS Engine service of MobiGATE
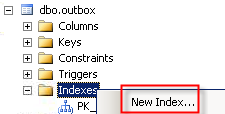
- Using SQL Management Studio, go to “indexes” of “dbo.outbox”, right-clickm select “New Index…”
- For “index name”, enter “To solve query timeout”
- Select “Nonclustered”
- Click “Add” to add 2 columns “datetime_queued” and “sent_status” (refer to red boxes below):

- Click “OK” button and a new index will be created:

- Start the SMS Engine service of MobiGATE
- Observe in log if this eror message still appear “ERROR [HYT00][Microsoft][ODBC SQL Server Driver]Query timeout expired“
- If it appears again, please fill-in the table below:
QUESTIONS ANSWERS (provide screen shot if available) REMARK Date of index created (as shown above) Take a screen capture of the SQL Management Studio showing: - the new index
- the columns in the new index
Date of the error message “ERROR [HYT00][Microsoft][ODBC SQL Server Driver]Query timeout expired” first appear Total number of records in “outbox” table when the error first appears Please send us: - the log file of the date when the error appear
- “config.xml” file

