| VMware | VirtualBox | |
| Installing USB Driver (USBDriverInstaller_SL80XX_V11.5.0.0.exe) | Easy to install without the needs of other pre-installation software. |
(source: https://www.wintips.org/how-to-setup-usb-on-virtualbox-guest-oracle/) |
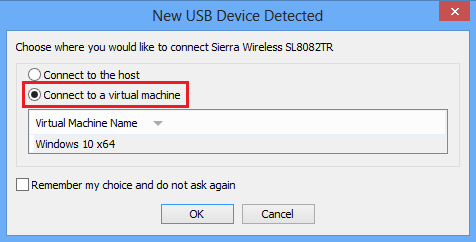
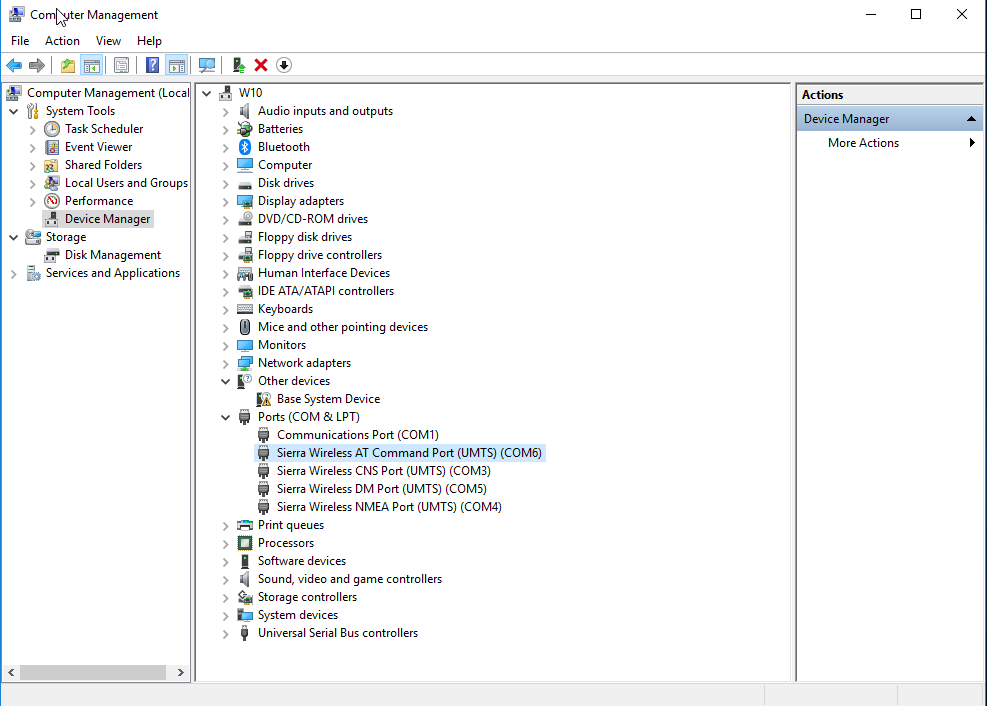
| MOBITEK S80 appearance in Device Manager | Can detect the MOBITEK S80 after USB Driver installed without COM port disappearing | It cannot detect MOBITEK S80 Modem vis USB port, refer to
The work around is to use serial port in VirtualBox by linking/mapping USB port (host) to serial port (VM), refer to https://mobitek-system.com/blog/2017/11/how-to-set-up-mobitek-s80-modem-in-virtualbox/ |
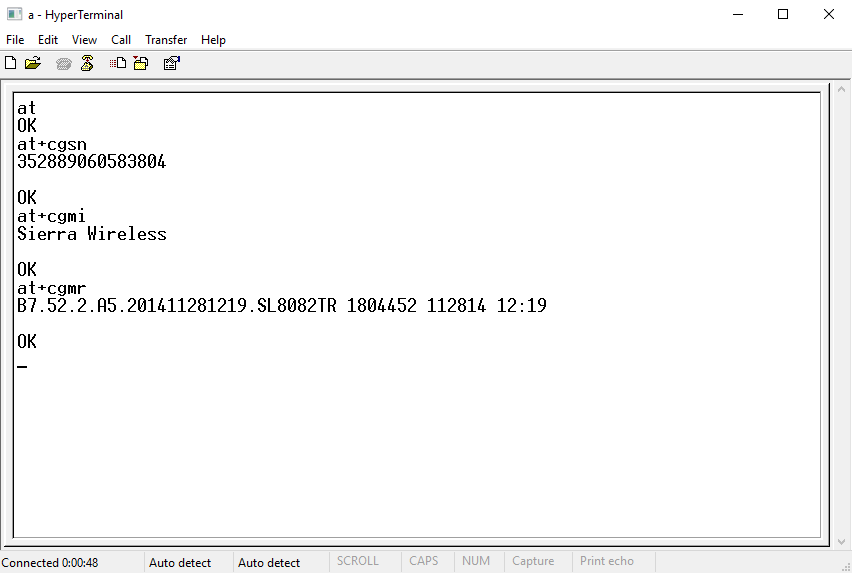
| Hyper Terminal test | Able to run Hyper Terminal test on connected MOBITEK S80 | MOBITEK S80 Modem will not response in hyper terminal if connected via USB port in virtual machine, refer to https://mobitek-system.com/blog/2020/06/fail-to-get-mobitek-s80-to-work-in-usb-port-in-virtualbox/ |
Category Archives: SMS Modem
How to Set-Up VMWare and MOBITEK S80 Modem in VMWare
Install VMWare Workstation 16 Player
- Go to https://www.vmware.com/products/workstation-player/workstation-player-evaluation.html. Download Workstation 16.0 Player for Windows.

- Run the installer file “VMware-player-16.0.0-16894299.exe” in your default download folder. If prompted click “Yes” to allow the installer to run.
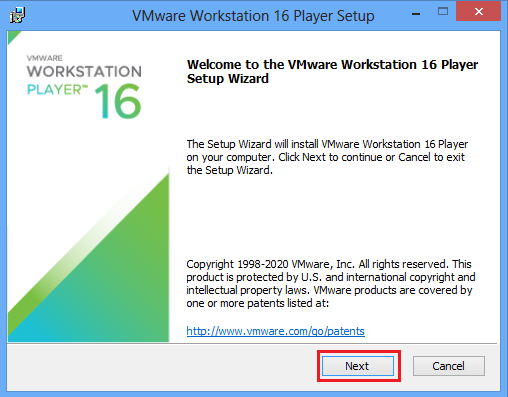
- Click “Next” to set up the program.
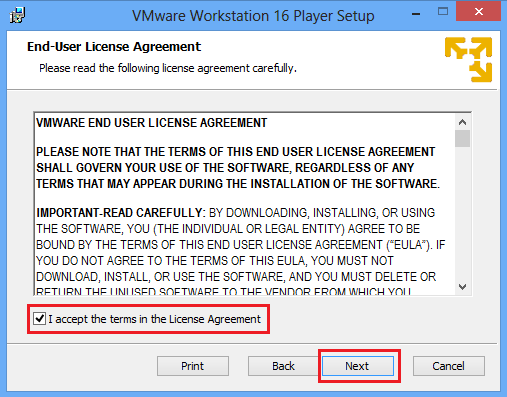
- Check “I accept the terms in the License Agreement” checkbox, then click “Next”.
- Set the preferred installation destination. You may leave the default selected features option in the checkbox or choose to install all features, click “Next”.

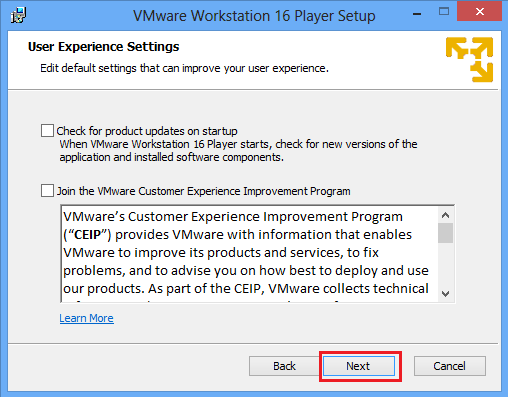
- Leave the checkbox as default, click “Next”.
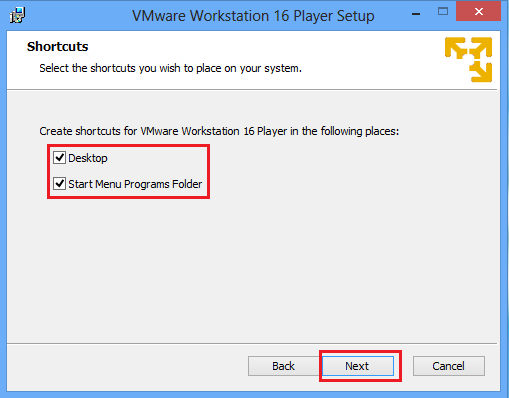
- Select the location of the shortcut that you want to place, click “Next”.
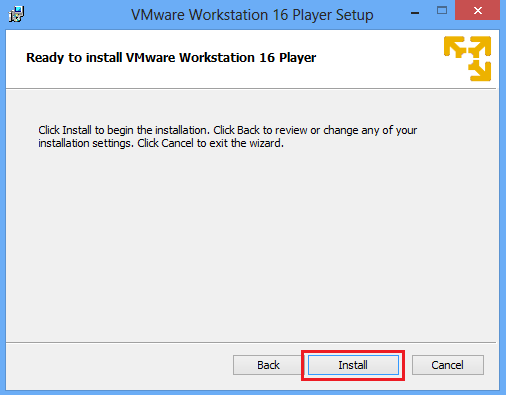
- Click “Install”.
- After the installation has completed, click “Finish”.

Create a New Virtual Machine Running Windows 10
The steps to create a new virtual machine (VM) in VMware Workstation 16:
-
-
- Launch VMware Workstation.
- Select “Create a New Virtual Machine”.
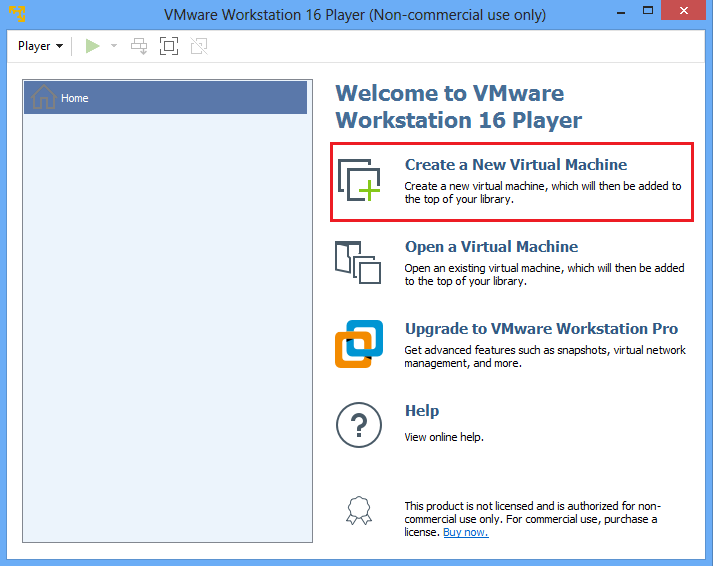
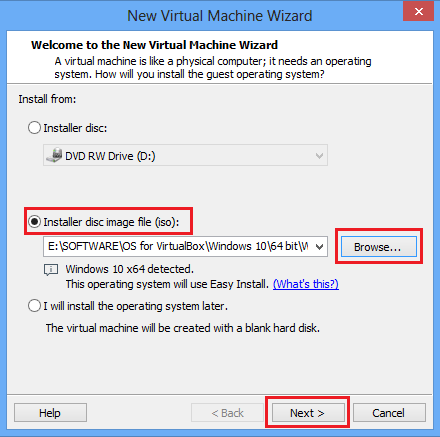
- Select the guest operating system (OS), then click “Next”. The OS can be installed using:
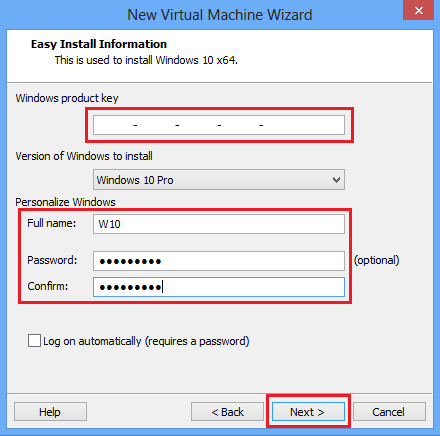
- Enter the product key. Create username and password (optional). Click “Next”.
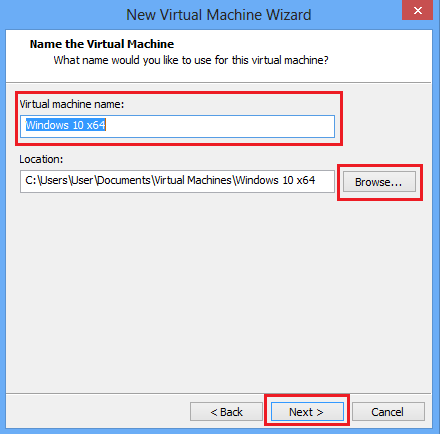
- Enter a VM name and specify the location to be saved. Click “Next”.
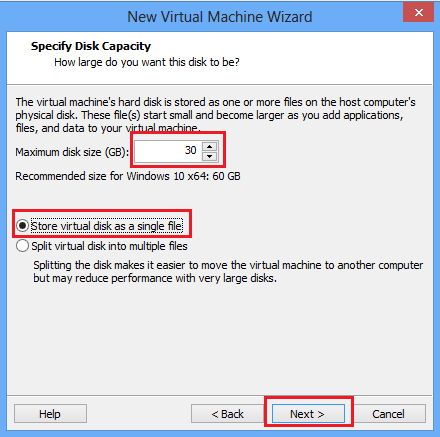
- Specify the disk size. Select between:
- Click “Finish” to create the virtual machine and start the installation.
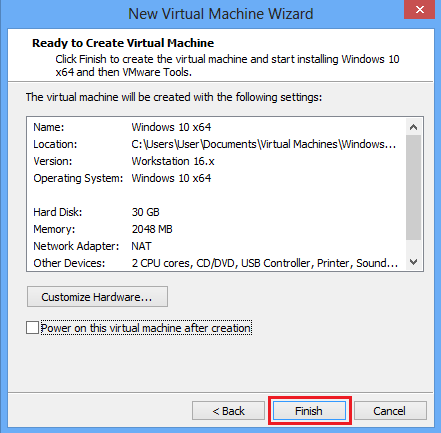
- When the VM is powered on, the VMware Tools installation starts. The VM may need to be restarted once the Tools installation completes.
-
VMware Workstation 16 Player Settings
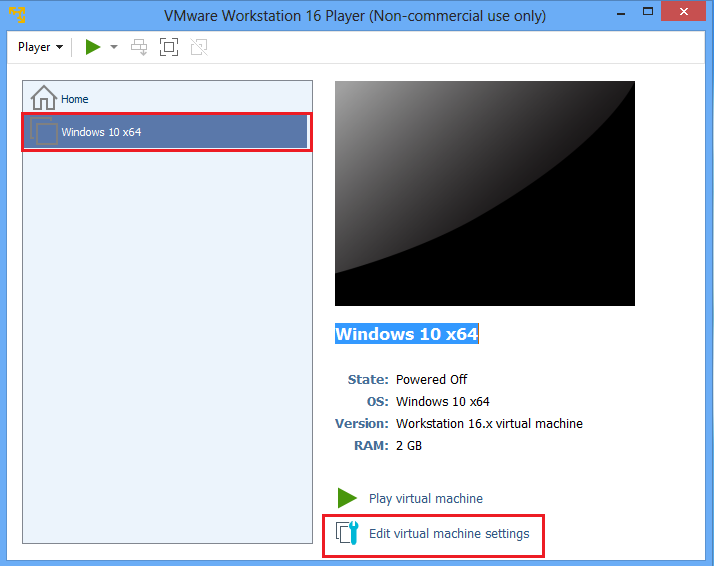
- Launch VMware Workstation.
- Click on the VM to configure, then click “Edit virtual machine settings”.
- In “Hardware” tab, click on “Network Adapter”. Under “Network connection”, select “Bridged: Connected directly to the physical network”. If VMWare in running on a laptop, check the “Replicate physical network connection state” checkbox. This option causes the IP address to be renewed when move from one wired or wireless network to another.
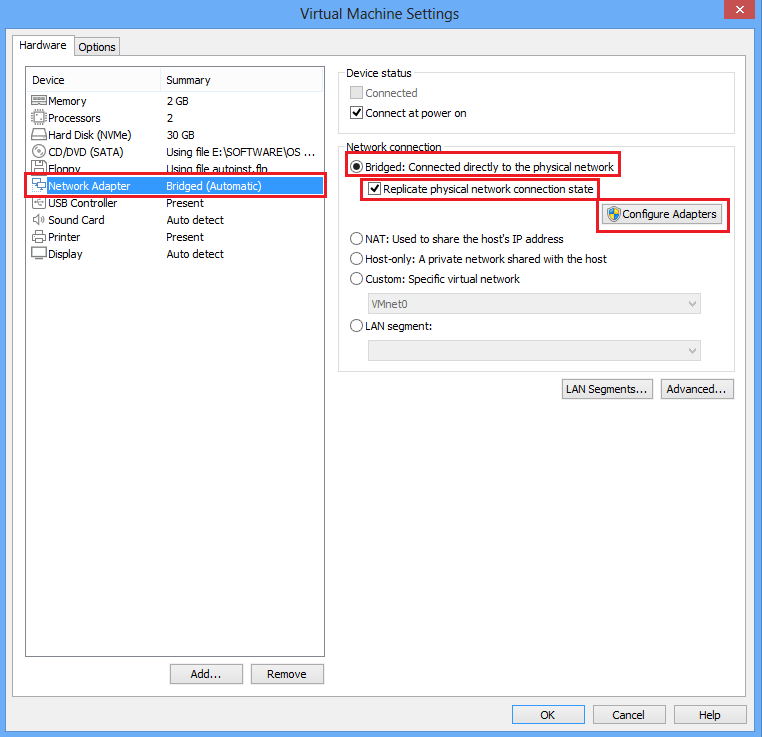
- Click on “Configure Adapters”.
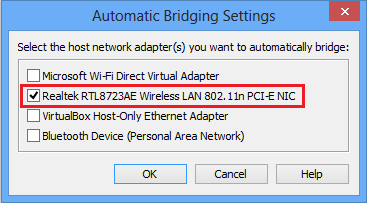
- In “Automatic Bridging Settings”, uncheck all adapters except the network adapter that is currently used (in this example, it is “Realtek”). Go to “Control Panel -> “Network and Internet” -> “Network Connections” to check.

Set-Up MOBITEK S80 Modem in VMWare
How to Solve USR-TCP Cannot Detect MOBITEK S80 Modem on LAN
- Use “Advance IP Scanner”

to scan for a free IP address on LAN. The free IP address will be assigned to MOBITEK S80 Modem later. - Disconnect MOBITEK S80 Modem from LAN.
- Directly connect MOBITEK S80 Modem with laptop/PC through LAN port/cable.
- Run “USR-TCP”,
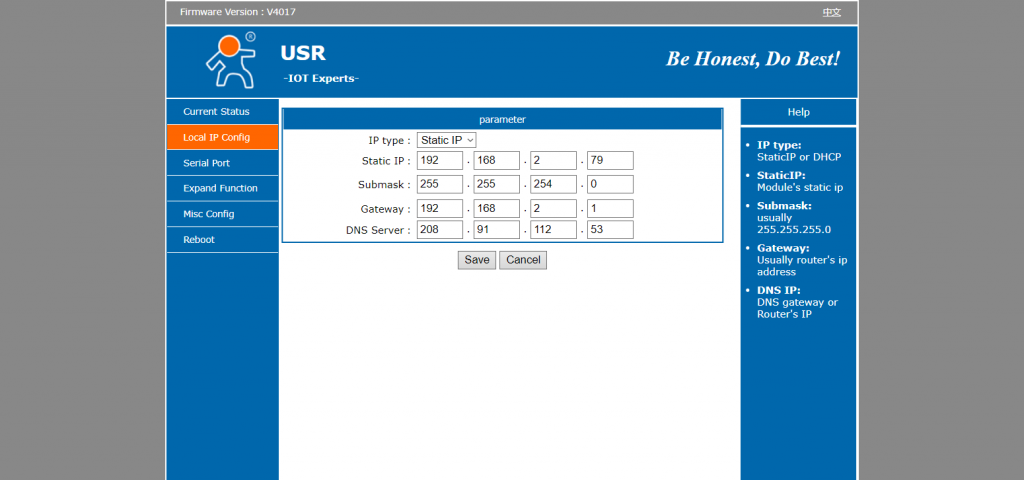
Assign a new IP address that does not belong to any device in “Advanced IP Scanner” (step 1) to the MOBITEK S80 Modem . As well as configure the “Default Gateway”, “Subnet Mask”, etc.
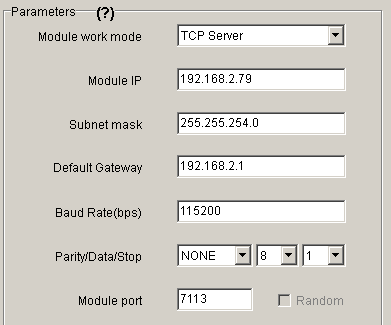
- Disconnect MOBITEK S80 Modem from laptop/PC.
- Re-connect MOBITEK S80 Modem to LAN through router/switch.
- Run “USR-TCP” to detect MOBITEK S80 Modem.
- If “USR-TCP” still cannot detect MOBITEK S80 Modem then use web browser, enter the IP address of MOBITEK S80 Modem into the address bar. If a web administration page is displayed then the connection is successfully established.
- Use “USR-VCOM”

to add a COM port that links the COM port with the IP address of S80. - Use “Hyper Terminal”, connect via COM port, run “hyper terminal test”. If test is passed then S80 is working on the LAN.
UCanAccess Driver Locks MS Access Database of SMS Engine — Basic Edition
Problem: SMS stuck in the “oubox” table and cannot be send out by SMS Engine — Basic Edition v. 5 and SMS Engine — Basic Edition v. 6.
Solution: Java application should use ODBC instead of UCanAccess to connect to “SMSEngine5.mdb” (version 5) or “SMSEngineVBNET.mdb” (version 6). Somehow, UCanAccess locks the records inserted into “outbox” table, preventing SMS Engine from retrieving those records and preventing SMS being send out.
TROUBLE SHOOTING #1: JDBC:UCanAccess
- DB Tool: DBeaver
- Driver: UCanAccess
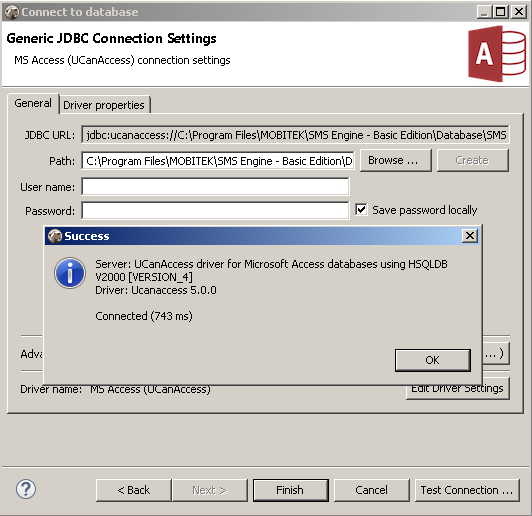
- JDBC URL: jdbc:ucanaccess://C:\Program Files\MOBITEK\SMS Engine – Basic Edition\Database\SMSEngine5.mdb
- Result:
TROUBLE SHOOTING #2: JDBC:ODBC
How to Connect to MS Access Database using JDBC:ODBC Connection
- Depending on whether your Java application is 32-bit or 64-bit, choose the correct ODBC Data Source Administrator (64bit or 32 bit) to create the Data Source Name. Otherwise, the connection cannot be established.
-
- If your Java application is 64-bit then use ODBC Data Source Administrator 64-bit
- If your Java application is 32-bit then use ODBC Data Source Administrator 32-bit
-
- Open ODBC Data Source Administrator (make sure the correct version is used).
- Select “System DSN” tab. Click “Add”.

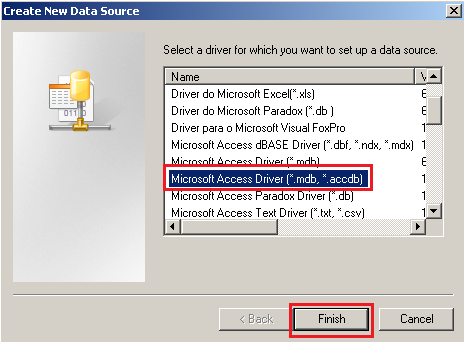
- In this example, we are connecting to MS Access database, in “Create New Data Source”, select “Microsoft Access Driver (*.mdb, *.accdb)” in the list. Click “Finish”.
- In “ODBC Microsoft Access Setup”, enter any “Data Source Name”. This name will be used in DBeaver later. So remember it. After that click “Select…” button.
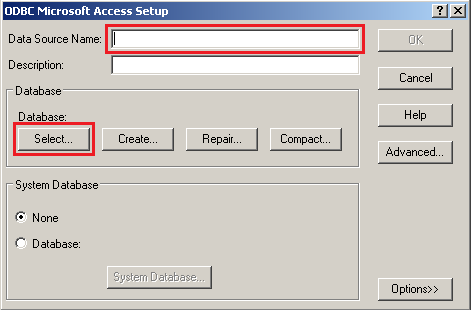
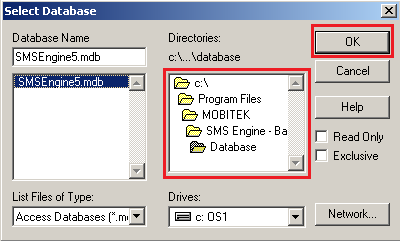
- Now you have to locate your MS Access file. In this example we use “SMSEngine5.mdb”. Click “OK”.
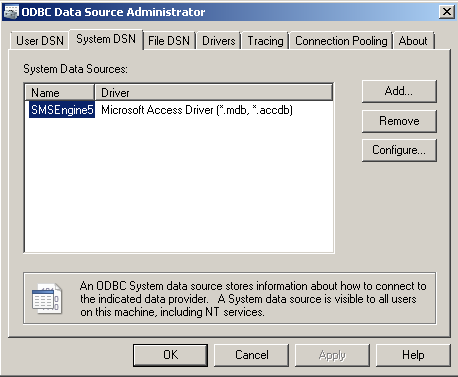
- Example of the Data Source Name created.
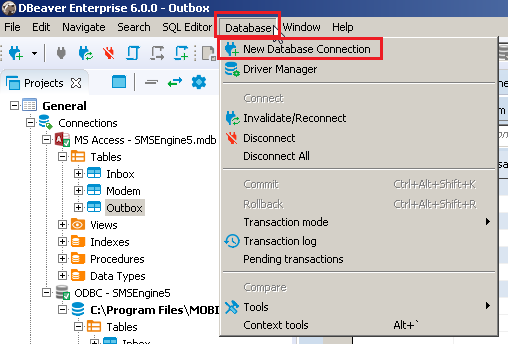
- Open DBeaver (or any other database management tool). Click on “Database -> New Database Connection”
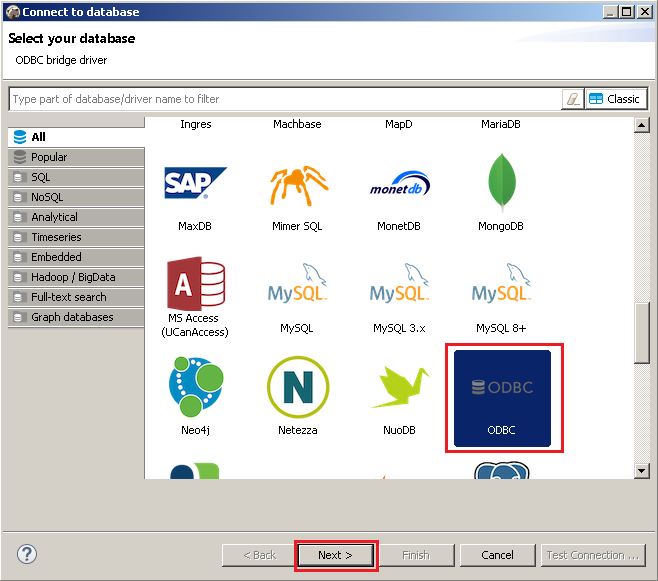
- In “Connect to database”, select “ODBC” in the list. Click “Next”
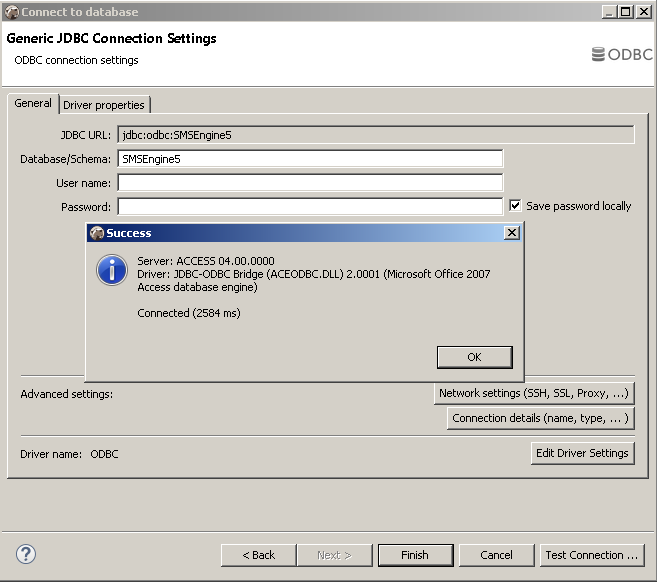
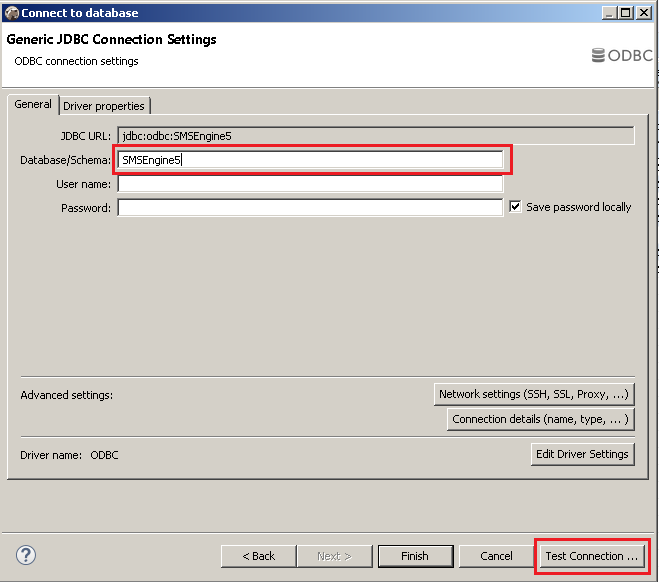
- Insert “Database/Schema” name the same like you created earlier in ODBC Data Source Administrator. Click “Test Connection” to test the ODBC connection.
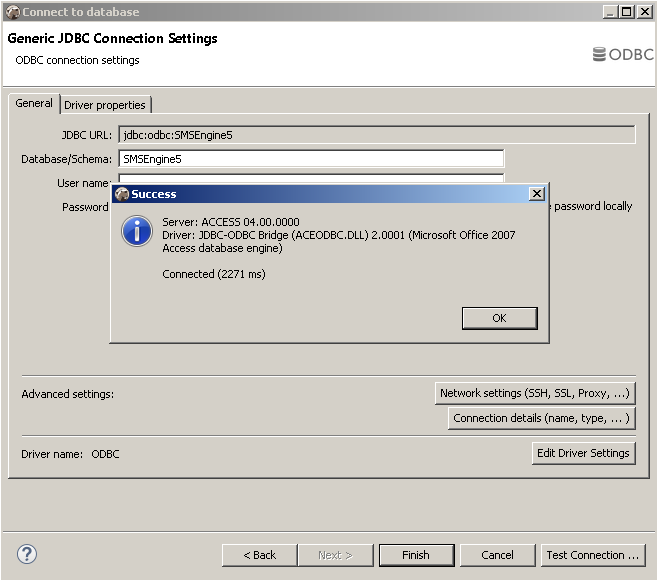
- If everything is setup right, you will get the below message. Click “Finish”
There is No AT Command to Remove “CNS Port”, “DM Port” and “NMEA Port” of MOBITEK S80 Modem / support case #281
Renaming “Sierra Wireless” in COM Ports
Objective: to use AT command to rename “Sierra Wireless” to “MOBITEK” so that all the 4 COM ports will display “MOBITEK”
Result: after using the “AT+WUSB” to change name to “MOBITEK”, the 4 COM ports in device manager still show as “Sierra Wireless” .
In addition, there is no AT command to remove the other 3 COM ports, “CNS”, ‘DM” & “NMEA”
USB Drivers of FX30 and MOBITEK S80 Have Conflict — Bad_pool_caller
Problem: the USB Drivers for both FX30 and MOBITEK S80 cannot be installed in the same machine. Otherwise the below blue screen error will appear when trying to connect MOBITEK S80 3G Modem to the PC/machine.
Solutions: there are 3 solutions to choose:
- reboot Windows into “last known good configuration” (source: https://support.microsoft.com/en-my/help/4026863/windows-fix-error-0xc2-badpoolcaller);
- run system restore to restore Windows to the a date before FX30 USB driver was installed; or
- uninstall FX30 USB driver.
MOBITEK S80 Modem Quick Installation Guide
Download and view — MOBITEK S80 Modem Quick Installation Guide
