Category Archives: PHPRunner

Comparison of E-mail API used in PHP

Runner_Mail() PHPMailer() PHP Mail()
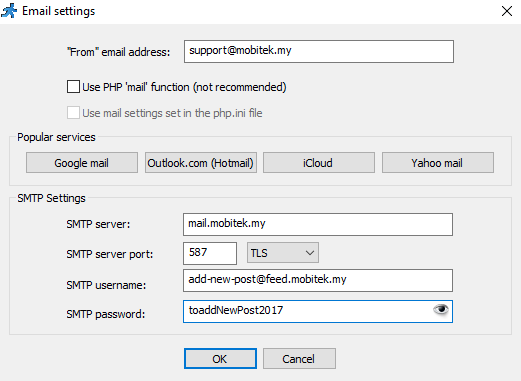
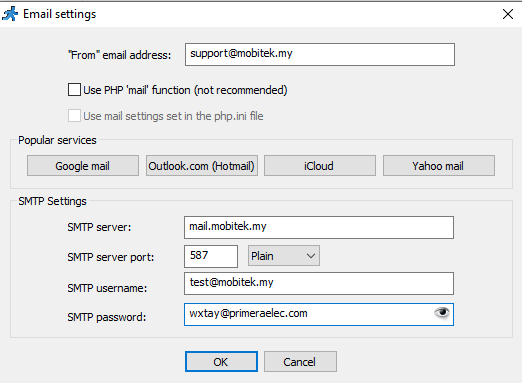
SMTP, user name, password, port, etc. are set inside the PHPRunner UI

PHPMailer() is called by Runner_Mail()

SMTP is set inside the PHP code itself

SMTP is set in “PHP.ini”
<?php

require_once(“include/dbcommon.php”);


$email = “t1@mobitek.my”;

$msg = “”;

$subject = “New data record”;


$msg.= “Message: [Message]\r\n”;

$msg.= “Recipient: Recipient\r\n”;

$msg.= “Date/Time: DateTimeQueue\r\n”;

runner_mail(array(‘to’ => ‘$email’, ‘subject’ => $subject, ‘body’ => $msg));

?>

<?php
include_once(‘libs/phpmailer/class.phpmailer.php’);
include_once(‘libs/phpmailer/class.smtp.php’);$mail = new PHPMailer( true );
// Mail settings
$mail->isSMTP();   //Send using SMTP
$mail->Host = ‘mail.sweetco.com.my’;   //Set the SMTP server to send through
$mail->SMTPAuth = true;   //Enable SMTP authentication
$mail->Username = ‘factory@sweetco.com.my‘;   //SMTP username
$mail->Password = ‘2022@Beranang@Factory’;   //SMTP password
//$mail->SMTPSecure = PHPMailer::ENCRYPTION_SMTPS;        //Enable implicit TLS encryption
$mail->Port = 587;   //TCP port to connect to; use 587 if you have set `SMTPSecure = PHPMailer::ENCRYPTION_STARTTLS`
$mail->setFrom(‘support@mobitek.my‘, ‘MOBITEK Support’);
$mail->isHTML(false);$mail->To = “t1@mobitek.my”;
$mail->Subject = “This is Subject”;
$mail->Body = “This the body”;
$mail->Send();?>
Open “php.ini” and search for “smtp” (there are no entries for no username and password)


[mail function]
; For Win32 only.
; http://php.net/smtp
SMTP = localhost
; http://php.net/smtp-port
smtp_port = 25

; For Win32 only.
; http://php.net/sendmail-from
sendmail_from =“admin@wampserver.invalid”

; For Unix only.  You may supply arguments as well (default: “sendmail -t -i”).
; http://php.net/sendmail-path
;sendmail_path =

; Force the addition of the specified parameters to be passed as extra parameters
; to the sendmail binary. These parameters will always replace the value of
; the 5th parameter to mail().
;mail.force_extra_parameters =

; Add X-PHP-Originating-Script: that will include uid of the script followed by the filename
mail.add_x_header = On

; The path to a log file that will log all mail() calls. Log entries include
; the full path of the script, line number, To address and headers.
;mail.log =
; Log mail to syslog (Event Log on Windows).
;mail.log = syslog

How to Implement Log-In Page using “Database” for a Web Application

  1. Edit “Email settings…” in “Misc” tab.
  2. Add new table “users” in “Security” tab.
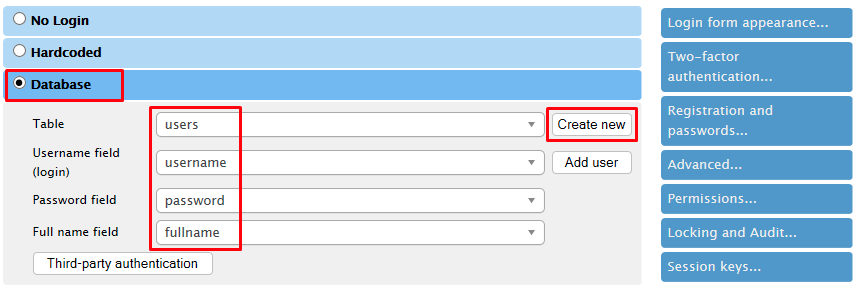
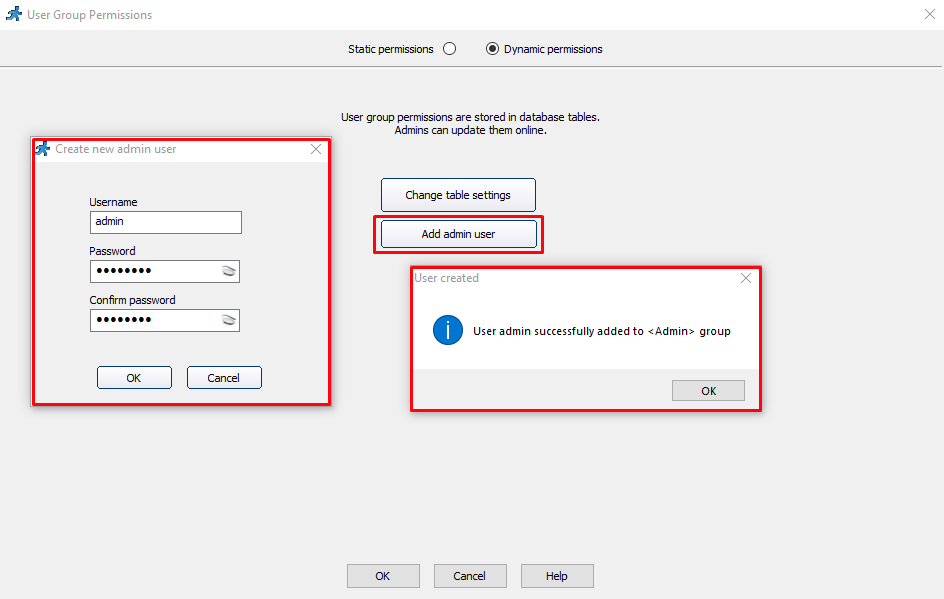
  3. Set “Dynamic permissions” in “Security” tab. Add a new user.
  4. Build and run the PHPRunner project in localhost. Log in using the username and password added previously. Let the PHPRunner project open in localhost.
  5. Go to PHPRunner project again. Enable “Password hashing (encryption)” in “Registration and passwords…”.
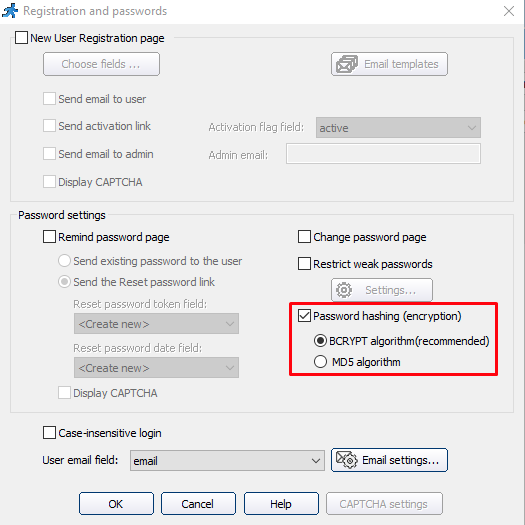
  6. Build and run PHPRunner project again in localhost.
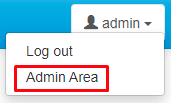
  7. Go to “Admin Area”.
  8. Go to “Add/Edit users”, edit the password. To use back the same password, first change the password to another password. Save it and then edit it back to change to the original password.

PHPRunner Allows Both Image and PDF File to be Uploaded

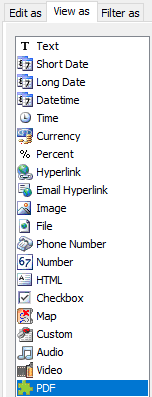
The Preferred Method — “View as File”

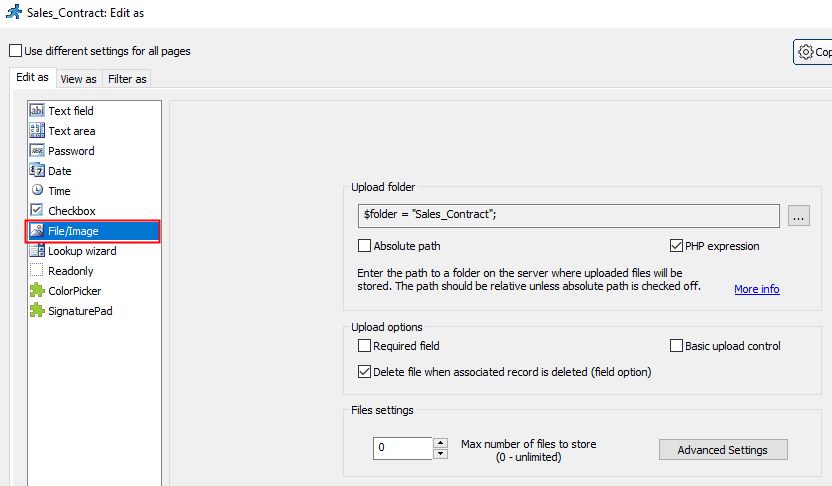
To set the field to allow both image and PDF file to be uploaded, go to “Designer” tab, select the field and click “View As/Edit As” button:

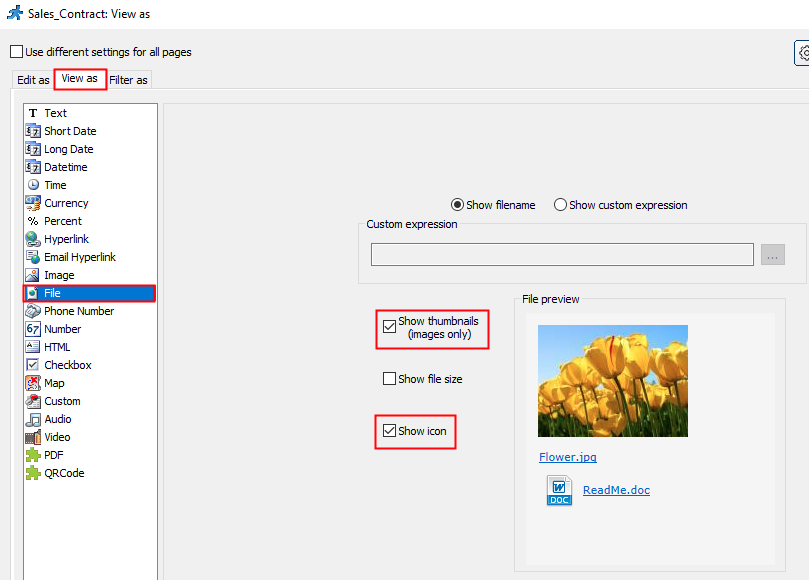
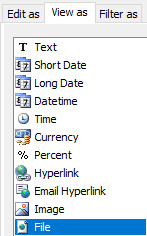
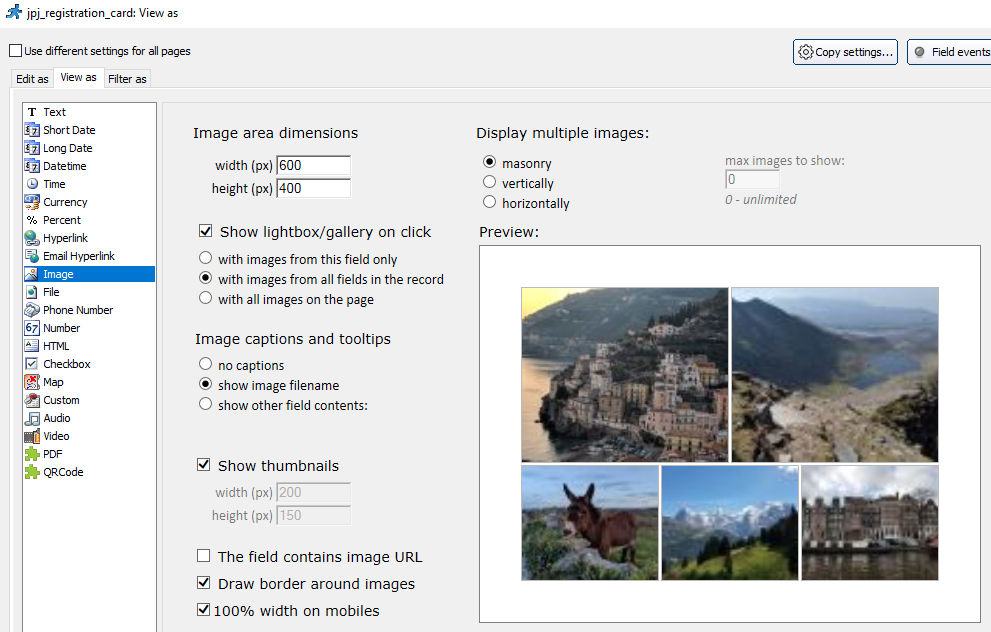
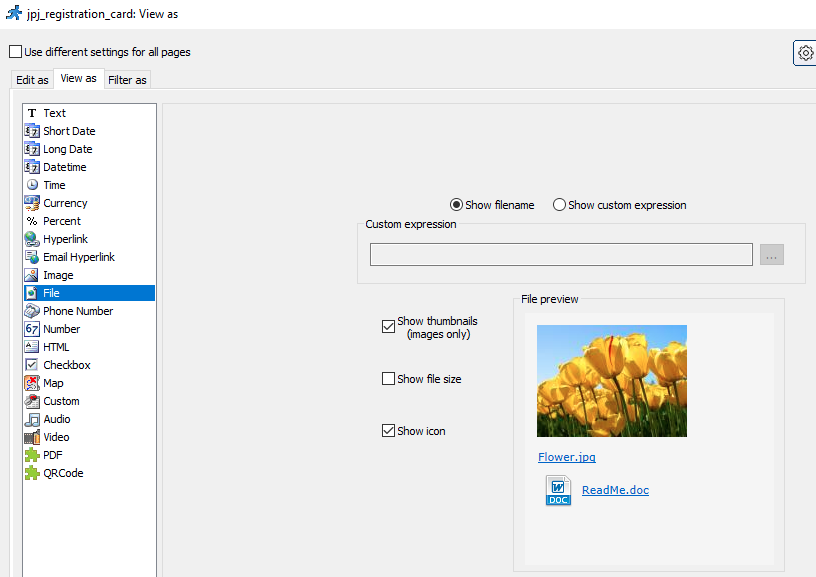
  • In “View as”, set the field as “File”
  • In “Edit as”:-

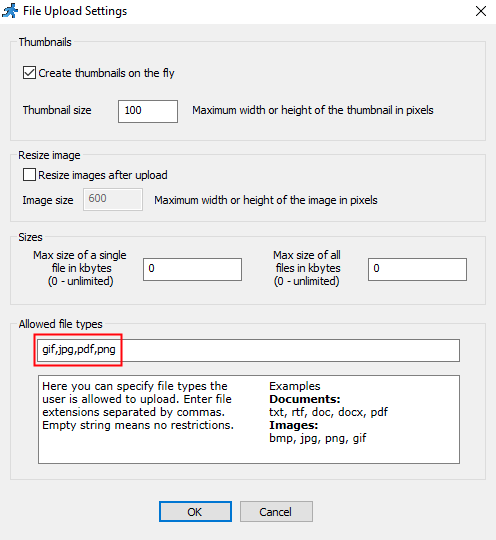
    In “Advanced Settings”, set the “Allowed file types” to accept both image and document format or just leave it empty to allow all file formats:-
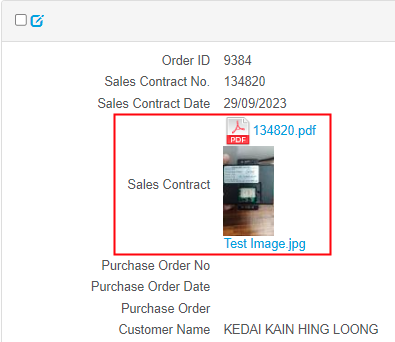
  • The result:-


Difference Among “view as image”, “view as file”, “view as PDF”

View as “Image”
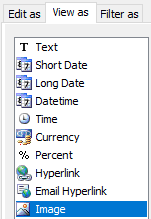
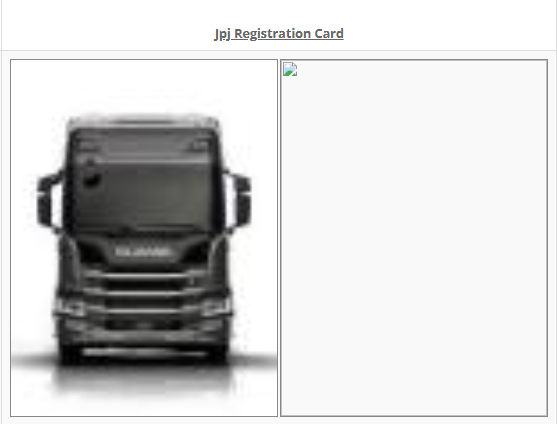
    • display only image but any document file will have a broken image
    • click on image will open a preview
    • click on document will get below error


View as “File”

    • display image (as thumbnail) and document (as icon).
    • click on image or document will download it.


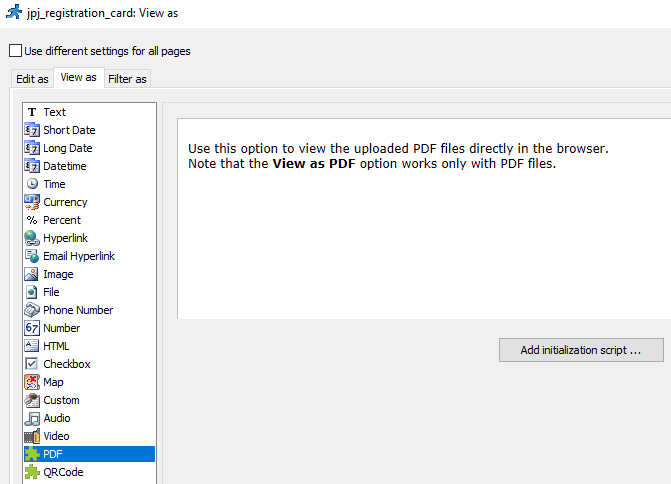
View as “PDF”

    • display both image and document as filename
    • click on image filename will download the image
    • click on document filename will open the document in a new tab for viewing without downloading


Conclusions on Both Image and PDF File Format

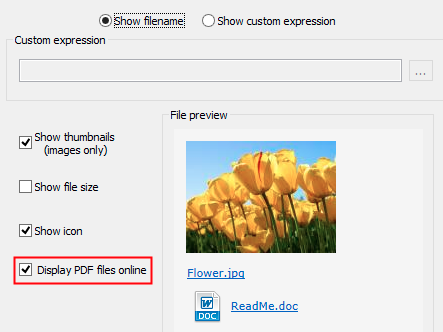
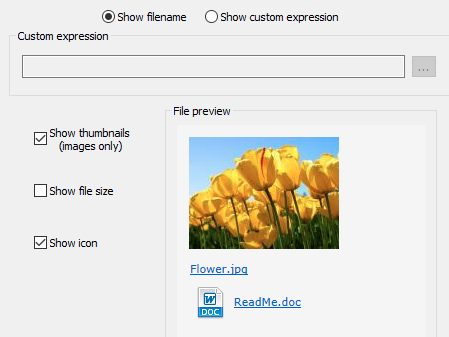
In the documentation (https://xlinesoft.com/phprunner/docs/view_as_settings_file.htm), there is “Display PDF files online” but not in our PHPRunner.

  • documentation
  • our PHPRunner

That’s the only way to view the PDF file uploaded online. But still the image file will be downloaded when clicked.


3 ways to show the uploaded image or file

  1. view as “Image” (only show image. can be viewed when clicked)
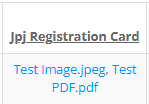
  2. view as “File” (show image and file as thumbnail and icon. downloaded when clicked. currently used for “jpj_registration_card” and “insurance”)
  3. view as “PDF (only show pdf, can be viewed)

4 Types of List Box or Drop Down Box in PHPRunner

Conclusion: there are 4 types of list box or drop down box in PHPRunner:-

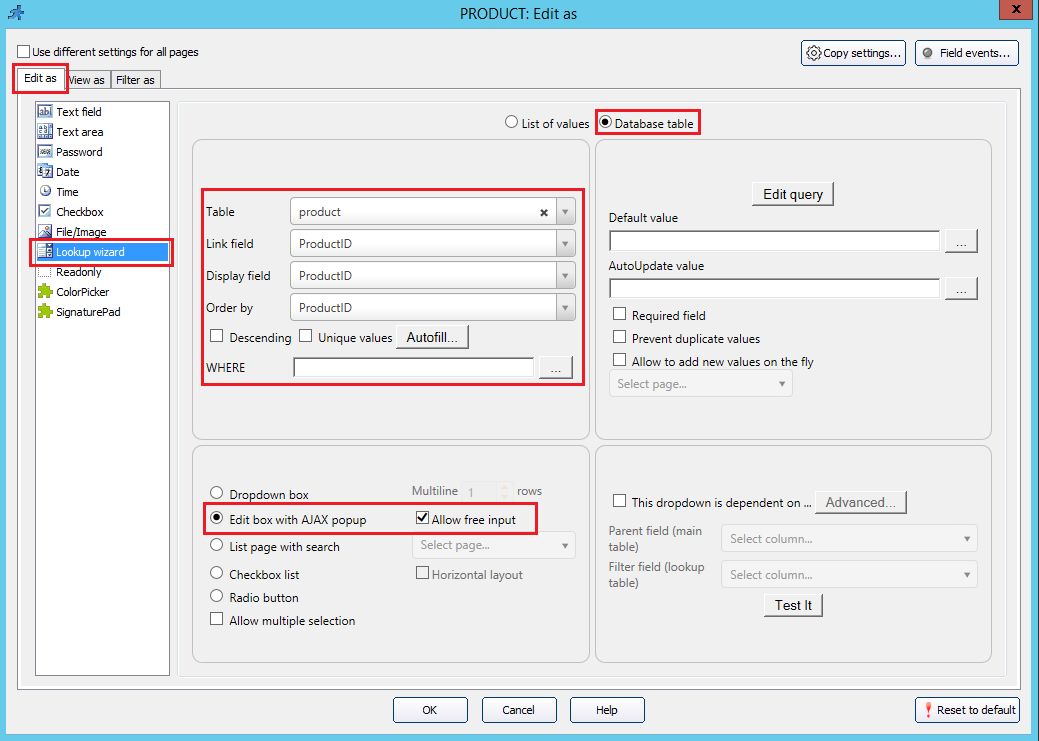
  1. Edit box with AJAX popup — linked with a table and allow user to input own text
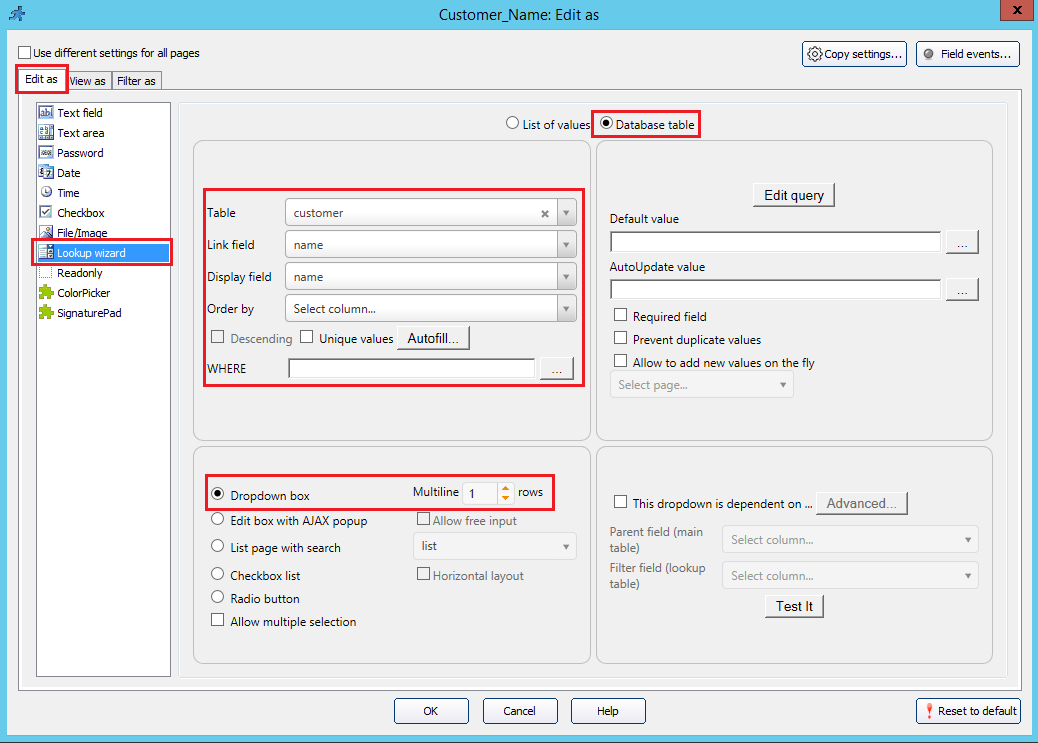
  2. Dropdown box linked with a table
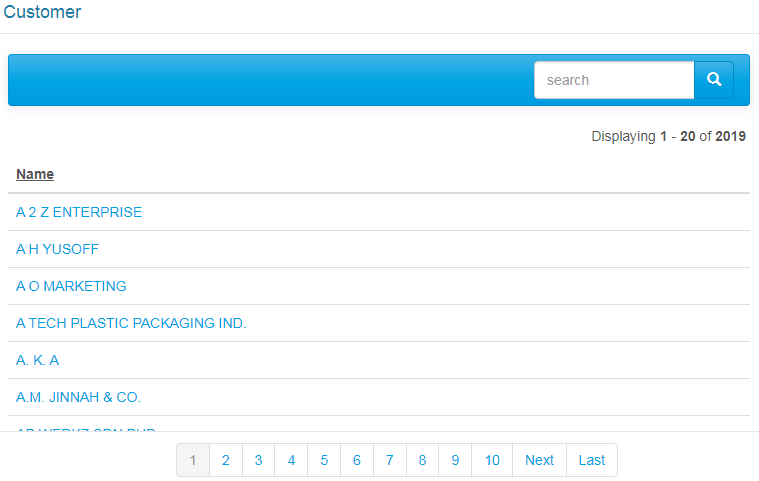
  3. List page with search
  4. Dropdown box with list of values (does not link with a table)


TYPES EXAMPLE Setting in PHPRunner
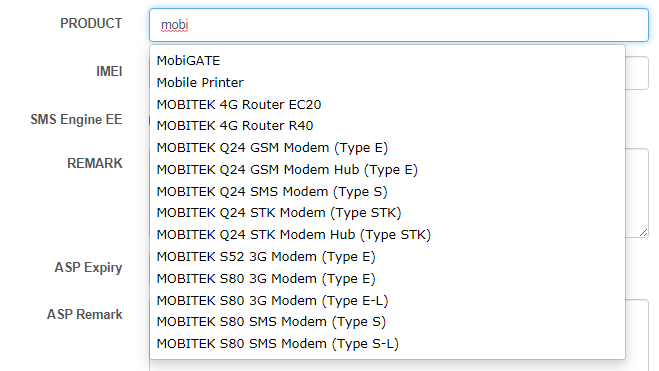
Edit box with AJAX popup

(works like the search suggestion when a value is entered in the text box and can allow free input from user)


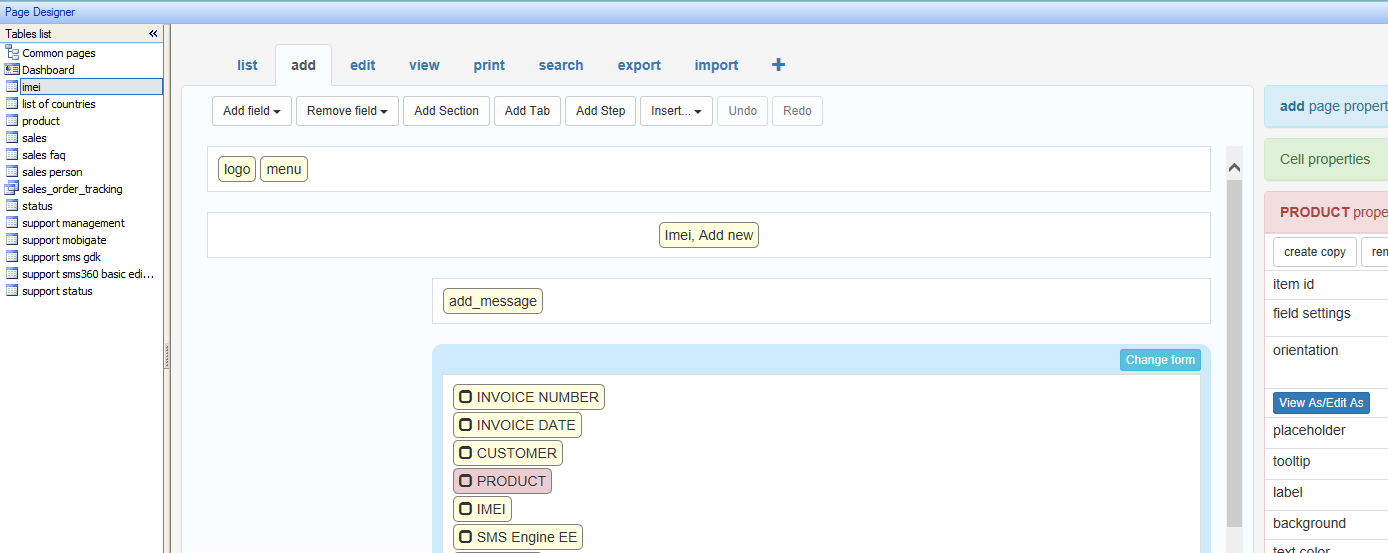
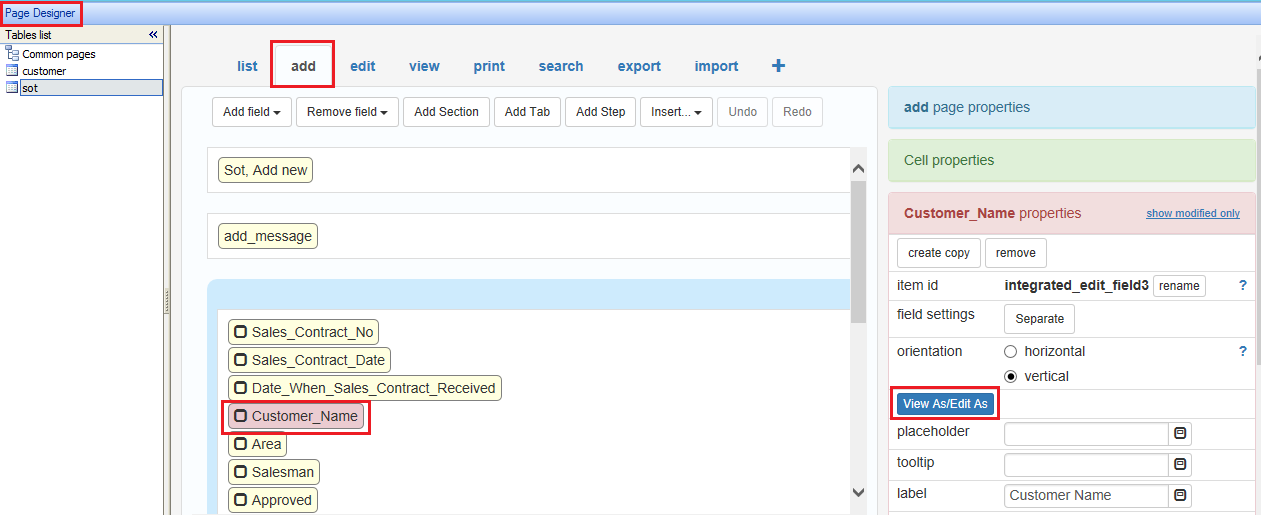
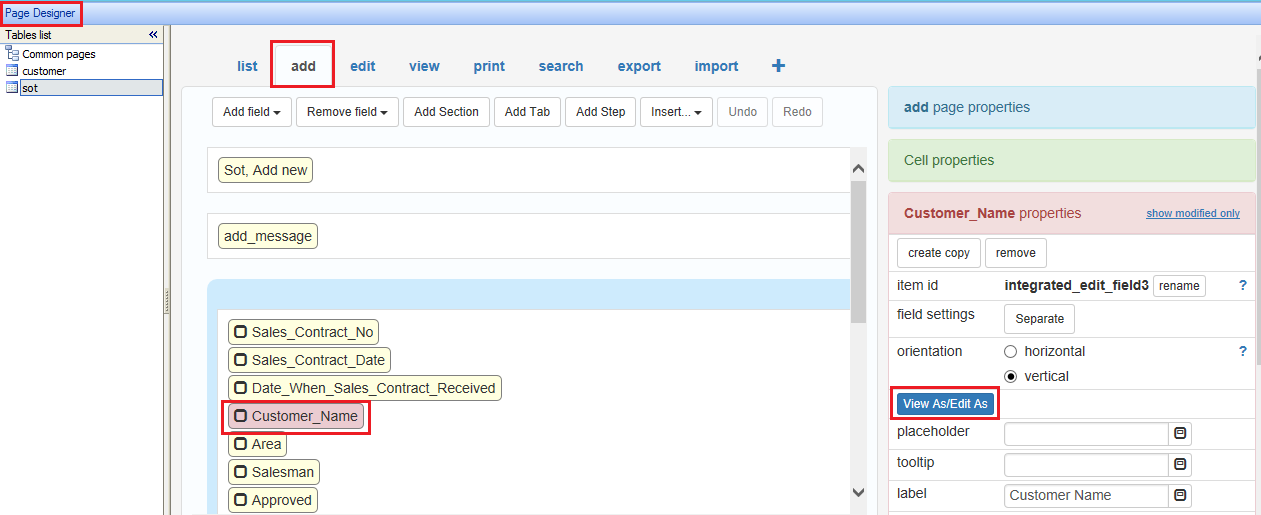
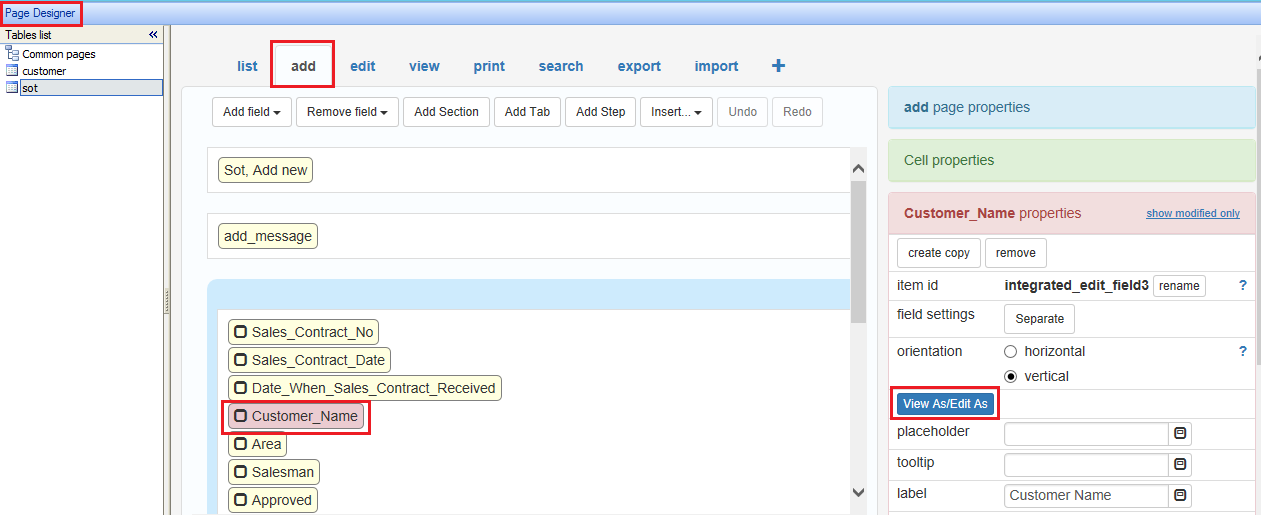
  1. Go to “Designer” -> “add” page -> (select any field to edit) -> click “View As/Edit As” button.

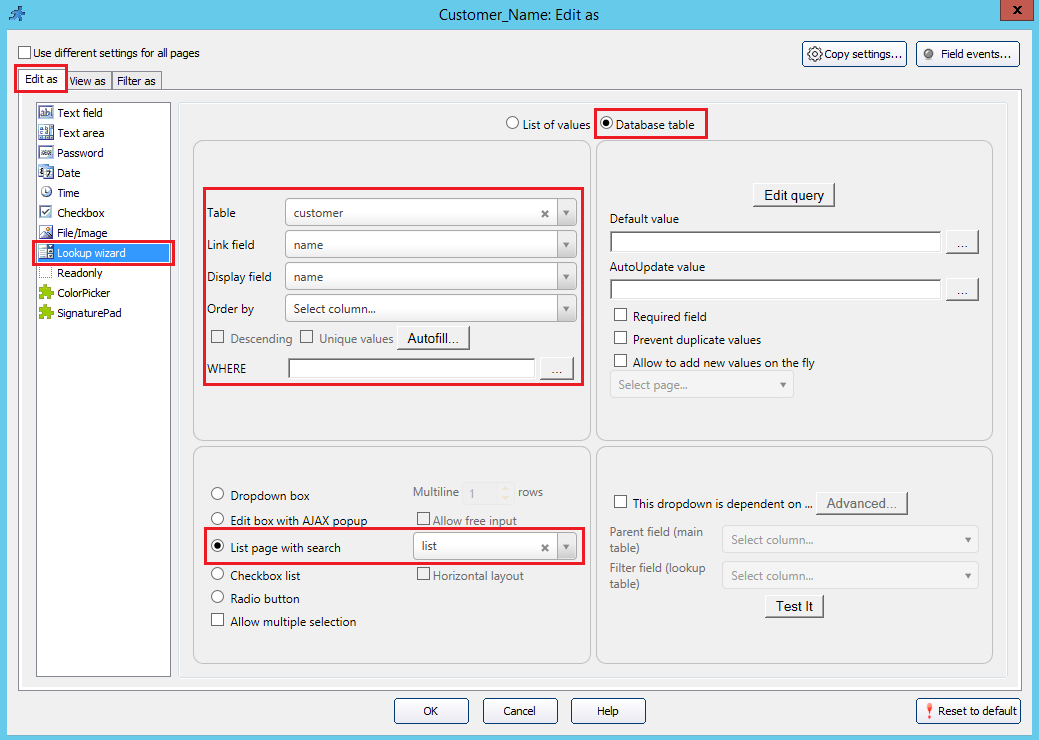
  2. Click on “Edit as” tab -> select “Lookup wizard” -> select “Database table” -> (set the table from database to fetch the data from) -> select “Edit box with AJAX popup” radio button, and check “Allow free input” if want the user to input any value that is not in the suggestion list.
Dropdown box

(used when the values fetched from database)


  1. Go to “Designer” -> “add” page -> (select any field to edit) -> click “View As/Edit As” button.

  2. Click on “Edit as” tab -> select “Lookup wizard” -> select “Database table” -> (set the table from database to fetch the data from) -> select “Dropdown box” radio button.
List page with search

(used when the values fetched from database)


  1. Go to “Designer” -> “add” page -> (select any field to edit) -> click “View As/Edit As” button.

  2. Click on “Edit as” tab -> select “Lookup wizard” -> select “Database table” -> (set the table from database to fetch the data from) -> select “List page with search” radio button.
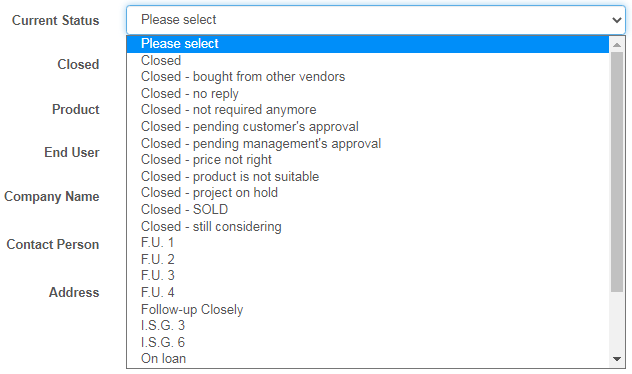
Dropdown box (List of values)

(used when the values are fixed and can be determined. i.e: list of countries, list of states)


  1. Go to “Designer” -> “add” page -> (select any field to edit) -> click “View As/Edit As” button.
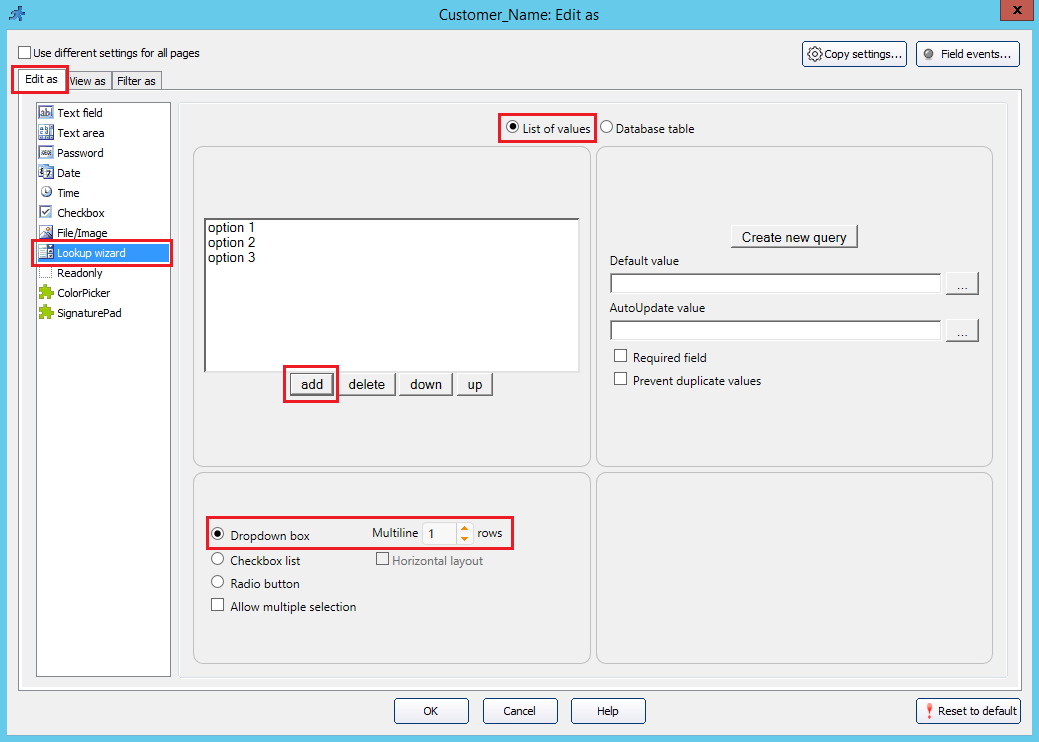
  2. Click on “Edit as” tab -> select “Lookup wizard” -> select “List of values” -> click “add” button -> (insert the values to be added to dropdown) -> select “Dropdown box” radio button.

The Difference Between “List Page” and “View Page”

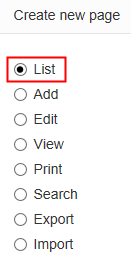
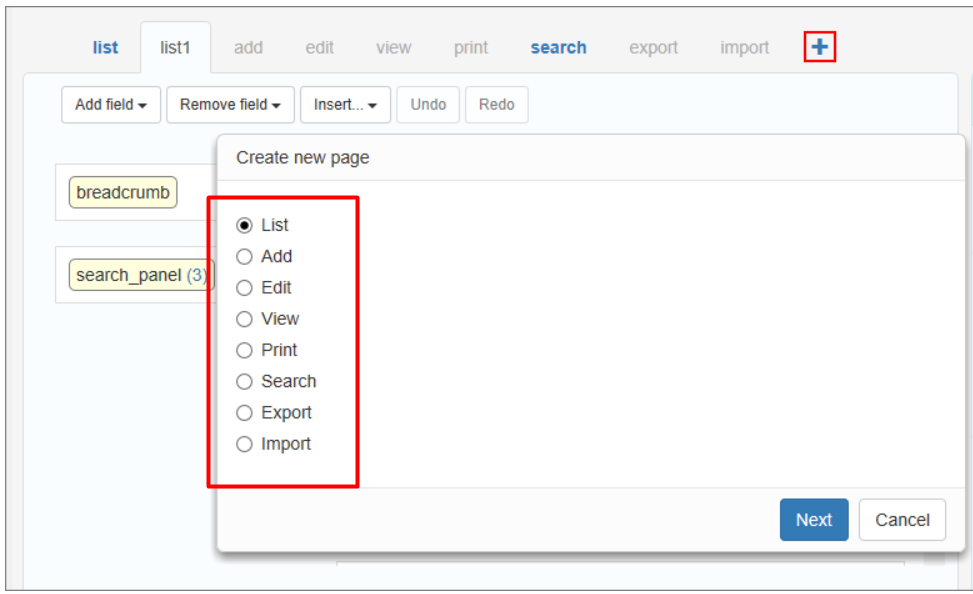
These are the web pages available:-


The difference between “List Page” and View Page”:-

LIST VIEW
https://xlinesoft.com/phprunner/docs/list_page_settings.htm
A page that shows the table records and the buttons to work with these records.
https://xlinesoft.com/phprunner/docs/choose_pages_screen.htm
A page that shows the selected record only, without the additional buttons.
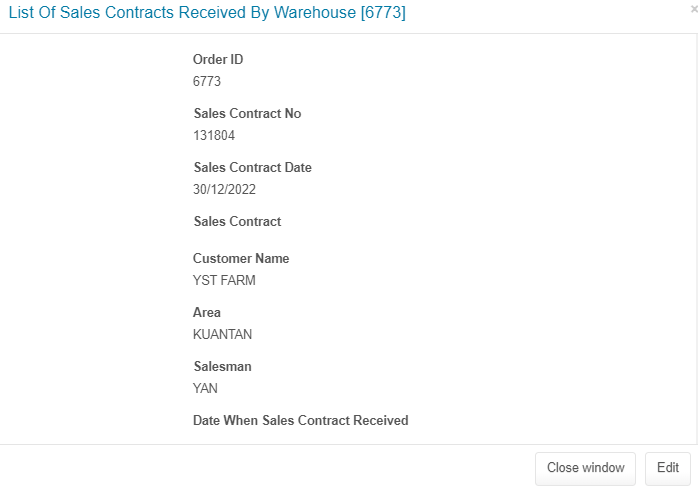
https://xlinesoft.com/phprunner/docs/insert-standard-button.htm#list_page
Functionality for List Page

  • grid_copy
  • grid_edit
  • grid_inline_cancel
  • grid_inline_edit
  • grid_inline_save
  • grid_view
  • Add new – Opens the Add page
  • Advanced search – Opens the advanced search page
  • Cancel – Visible when an inline add or edit is active. Cancels all edits
  • Create PDF – Downloads the table as a PDF document
  • Delete – delete the selected records
  • Delete selected – delete the selected records
  • Edit selected – Edits the selected records
  • Export results – Exports all of the results/the selected records into an .xls, .doc, or .csv file to download
  • Export selected – Exports all of the results/the selected records into an .xls, .doc, or .csv file to download
  • Hide search panel – Hides or shows the search panel
  • Import – Allows importing data from .xls, .csv files, or a simple text
  • Inline Add – Visible when the List page allows inline adding. This button opens an inline adding interface
  • Inline Edit – allows to edit multiple records without leaving the List page
  • Print – Opens the Print page
  • Save all – Visible when an inline add or edit is active. Saves all records that are being edited
  • Save search – Saves the current search for later retrieval
  • Show search panel
  • Update selected – allows editing multiple records at once
https://xlinesoft.com/phprunner/docs/insert-standard-button.htm#view_page
Functionality for View Page

  • next/prev – These buttons switch between the records in the table
  • Back to list – Opens the List page
  • Close window – Closes the window. Visible only in a popup window
  • Edit – Opens the Edit page
  • Next step – Proceeds to the next step
  • PDF View – Creates a PDF document of the Print or View page

Different Grid Type in PHPRunner

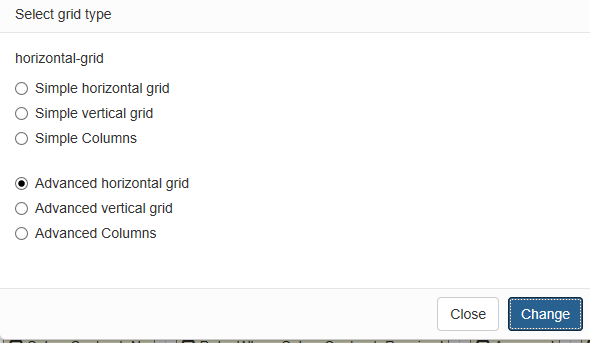
  1. The difference of grid type as shown in table below.
  2. There is no difference between “advance” and “simple” in terms of web UI. The difference is in the “Designer” tab of PHPRunner.
    GRID TYPE

    WEB UI
    horizontal grid
    vertical grid
    columns

Renaming Column Name will Affect PHPRunner

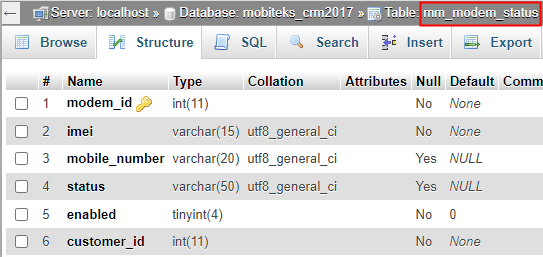
If column name is renamed via PHPMyAdmin or PHPRunner, the records will be missing from the list page (tellow table) despite there are 3528 records:-


The following solutions DOES NOT work:-

  1. Remove all fields in stock card’s list page and add them all again.
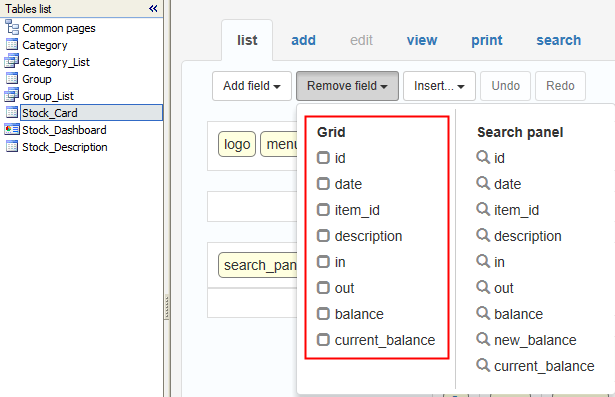
  2. Delete current list page and add a new list page.
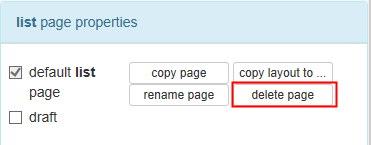
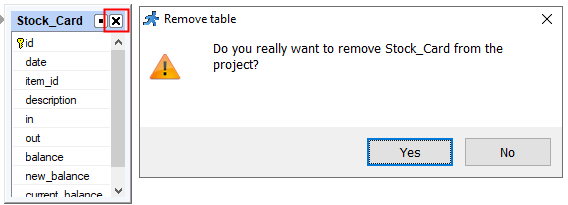
  3. Remove the table and add it again.


The only solution is to re-build the PHP project from scratch.

The possible root cause is the PHP project was built using old version (e.g. version 10.3) or trial version of PHPRunner. Then column name is renamed in the new version of PHPRunner, e.g. version 10.4.

How to Rename “List” in PHPRunner

There are 3 places that need to modify:

  1. Custom views table
  2. Top menu
  3. Landing page menu (no need to modify if this is removed)
 

BEFORE AFTER MODIFICATION IN PHPRunner
List Of Sales Contracts Not Reserved, Loaded Or Delivered Rename to
List Of Sales Contracts NOT Delivered
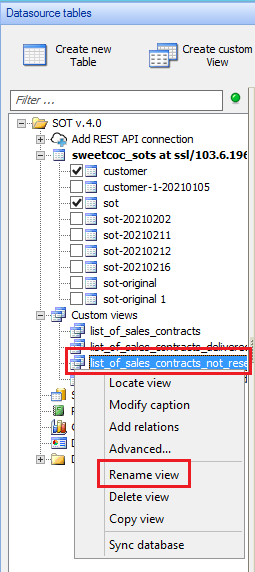
  1. Go to “Tables” tab -> right-click on select “list_of_sales_contracts_not_reserved_loaded_or_delivered” under Custom views -> select “Rename view”.
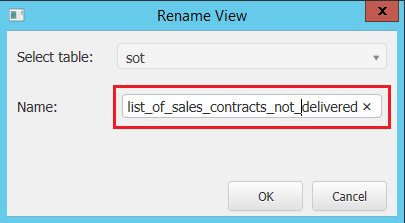
  2. In “Rename View”, rename “list_of_sales_contracts_not_reserved_loaded_or_delivered” to “list_of_sales_contracts_not_delivered”.
  3. In the same “Tables” tab -> click on “Menu editor” button.
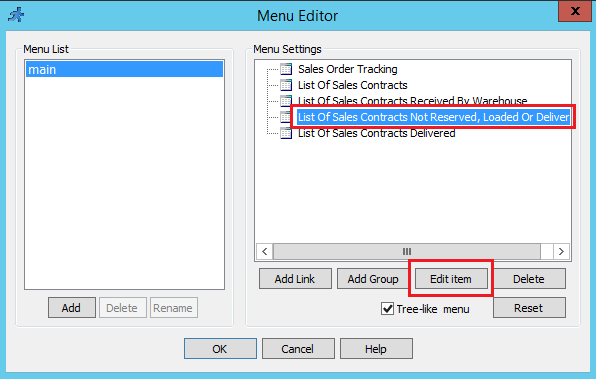
  4. In “Menu Editor” -> select “List_Of_Sales_Contracts_Not_Reserved_Loaded_Or_Delivered” under the “Menu Settings” -> click “Edit item” button.
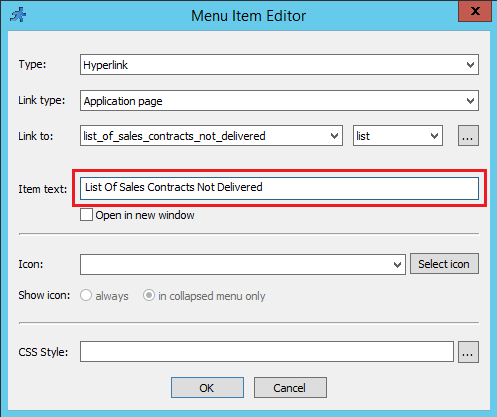
  5. In “Menu Item Editor”, rename “List Of Sales Contracts Not Reserved Loaded Or Delivered” to “List Of Sales Contracts Not Reserved Loaded Or Delivered”
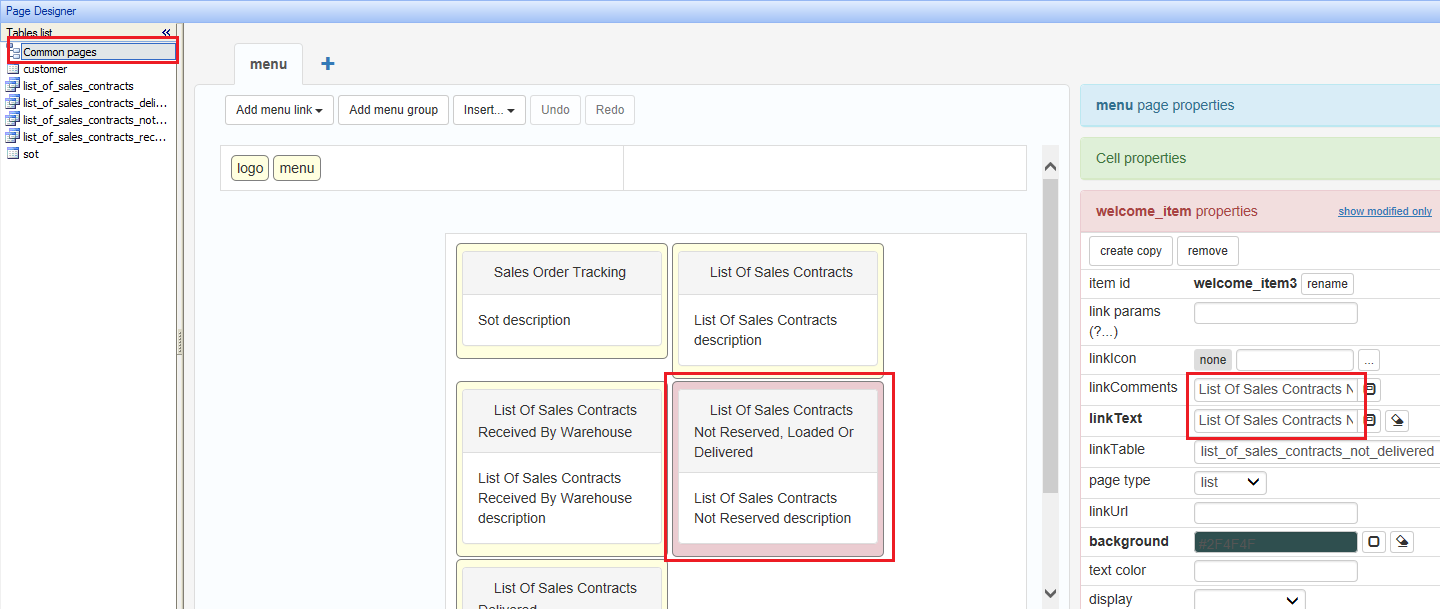
  6. Go to “Designer” tab -> select “Common pages” in the Tables list -> select “List Of Sales Contracts Not Reserved Loaded Or Delivered” -> in “linkComments” and “linkText”, rename the text to “List Of Sales Contracts Not Delivered”.